Recently, 5th grade artists re-visited figure drawing, specifically gesture drawing, to create sketches for an aluminum foil figure sculpture.
During the first class, students took turns posing for quick gesture sketches, where we focus on the gesture and pose, rather than details. Students chose dynamic poses inspired by a variety of physical activities. We also experimented with using charcoal for some of the sketches, which helped us draw quickly and stay loose with our lines. (Although they also got very messy!)
The following class, students selected one gesture to turn into a sculpture. We began by discussing armatures, which are like skeletons for a sculpture. The armature provides structure and support, much like our skeleton does for our body or steel beams for a skyscraper. Using pipe cleaners, students created an armature by attaching, twisting and manipulating the pipe cleaners to create a basic figure.
The next class, student used aluminum foil to wrap pieces around the armature. Following the shape and gesture of the figure, students added an aluminum foil layer onto their armature. The last step was to get their figure hot glued to their cardboard base. Some students added an aluminum foil soccer ball or hockey stick to complete their sculpture. Here are some examples of our figures in motion!
 |
| Jasper, 5th Grade |
 |
| Marissa, 5th Grade |
 |
| Kevin, 5th Grade |
Continuing our study of texture, 2nd grade artists learned about gyotaku, a traditional method of Japanese fish printing that dates from the mid 1800's. In Japanese, "gyo" means "fish" and "taku" means "rubbing." We began by watching a TED video that explains the history of gyotaku, as well as the techniques.
We discussed how gyotaku allowed fisherman to keep a record of their catch, both the size of the fish and the species, before cameras were invented. Eventually, it became its own art form and is practiced today.
For our gyotaku printing experience, we used rubber fish, instead of real ones! We watched a demonstration as a class to understand the steps involved and then we took turns at each table with printing our fish.
First, we painted tempera paint onto the fish using a brush. We began with black paint, to mimic the sumi ink that is traditionally used.
After brushing paint all over the fish, you take paper -- we used newsprint paper, to mimic traditional rice paper -- and place it on top of the fish. We pressed the paper down to get all the different parts of the fish, as well as to capture the textural details.
Then we lifted the paper off to reveal the fish print! We put our prints in the drying rack and everyone printed once with black paint, and then another with color. We experimented with different colors to emphasize the shape and different parts of the fish.
Next class, we learned about three different watercolor painting techniques to create the background for our fish print. The first technique we learned about was wet-on-wet, which involves painting the paper with water first and then dropping or painting with watercolor on top for a blurry effect. The second technique was blotting, which involves dabbing and removing some of the paint with a paper towel. The last technique, which was the most popular, was using salt! After painting an area, students sprinkled some salt on top and watched as the salt absorbed the water in the paint to create texture.
For our last class, we selected our best print, cut out the fish and glued it on top of the painted paper. The final step was to add a chop or signature, using red marker. Some students used their initials while others used symbols to represent their signature. We got to keep the other print, as well. Below are examples of our finished gyotaku projects!
 |
| Miah, 2nd Grade |
 |
| Pirada, 2nd Grade |
 |
| Zachary, 2nd Grade |
 |
| Anna, 2nd Grade |
|
|
|
Thank you to all the families and students who came to the PK/K Art & Music Showcase this morning! And thank you for taking the time to come to our art shows and events throughout the year, and
support our artists by talking to them about what they do in art!
Student artwork was on display in the auditorium foyer, including our self portrait assemblages, Louise Nevelson inspired assemblages and feeling face mixed media pieces.
Also, there was an example of our collaborative class mural inspired by Eric Carle, and more information about our process. The rest of the mural were hanging up as a backdrop for our show! Students sang songs with their class, as well as a "You are my Sunshine" with all the classes.
I put together a slideshow to show what
we have been learning and exploring throughout this year in art class. It is
not just about the work on display and the work that goes home, but the creative process and art making experience that your students engage in during art class. Here is the slideshow, in case you wanted to take another look. Thank you for a fantastic year and I'm looking forward to
next year!
1st grade has been thinking about how parts make up a whole. We brainstormed different animals that have different shaped tails, inspired by a variety of different colored and shaped tails.
After brainstorming, students selected one animal and drew it, breaking it down into shapes. We considered composition, so there would be space for the animal's body and tail, and how different animals are taller or wider. After drawing the animal, students thought carefully about where the tail would be and glued down the tail.
The following class, students mixed colors and painted their animal's body, thinking about the texture of the animal they chose, such as smooth, furry, scaly, or bumpy. They thought about how their animal might look if it were running or flying.
The last class, students painted the background for their animal, which included the animal's habitat or environment.
Students were encouraged to mix new colors and think about how to show the sky, water and desert. We also thought about interesting details to add to the background, such as a banana in a tree or a cactus in the desert.
Here are some examples of our animals with tails. Some of the paintings are on display for the Extravaganza in the connector hallway!
 |
| Siobhan, 1st Grade |
 |
| Andrew, 1st Grade |
 |
| Ally, 1st Grade |
 |
| Ava, 1st Grade |
 |
| Gustavo, 1st Grade |
 |
| Evey, 1st Grade |
 |
| Yensi, 1st Grade |
 |
| Prarthna, 1st Grade |
|
|
PK and Kindergarten artists recently re-visited lines and shapes, which we focused on at the beginning of the school year. We reviewed our lines and shapes, taking turns coming up to the board to draw different examples. We remembered a lot of what we learned several months ago!
Then we found out that we would be making lines and shapes out of different materials to create a sculpture. We learned that sculptures are artworks that are 3D, not flat like paintings and drawings.
We used model magic on top of a cardboard to form the base of the sculpture. Then students explored how to bend, twist and manipulate the straws, wires and pipe cleaners to create a variety of lines and shapes. They stuck these into the model magic to form their sculptures.
Students were encouraged to turn their sculptures around, to view them from different angles as they worked.
We also walked around and looked at the other sculptures in progress.
Below are some examples of our line and shape sculptures. Some classes had time to come up with titles for their sculptures.
 |
| David's "Tarantula" |
 |
| Eva's "Circle World" |
2nd grade
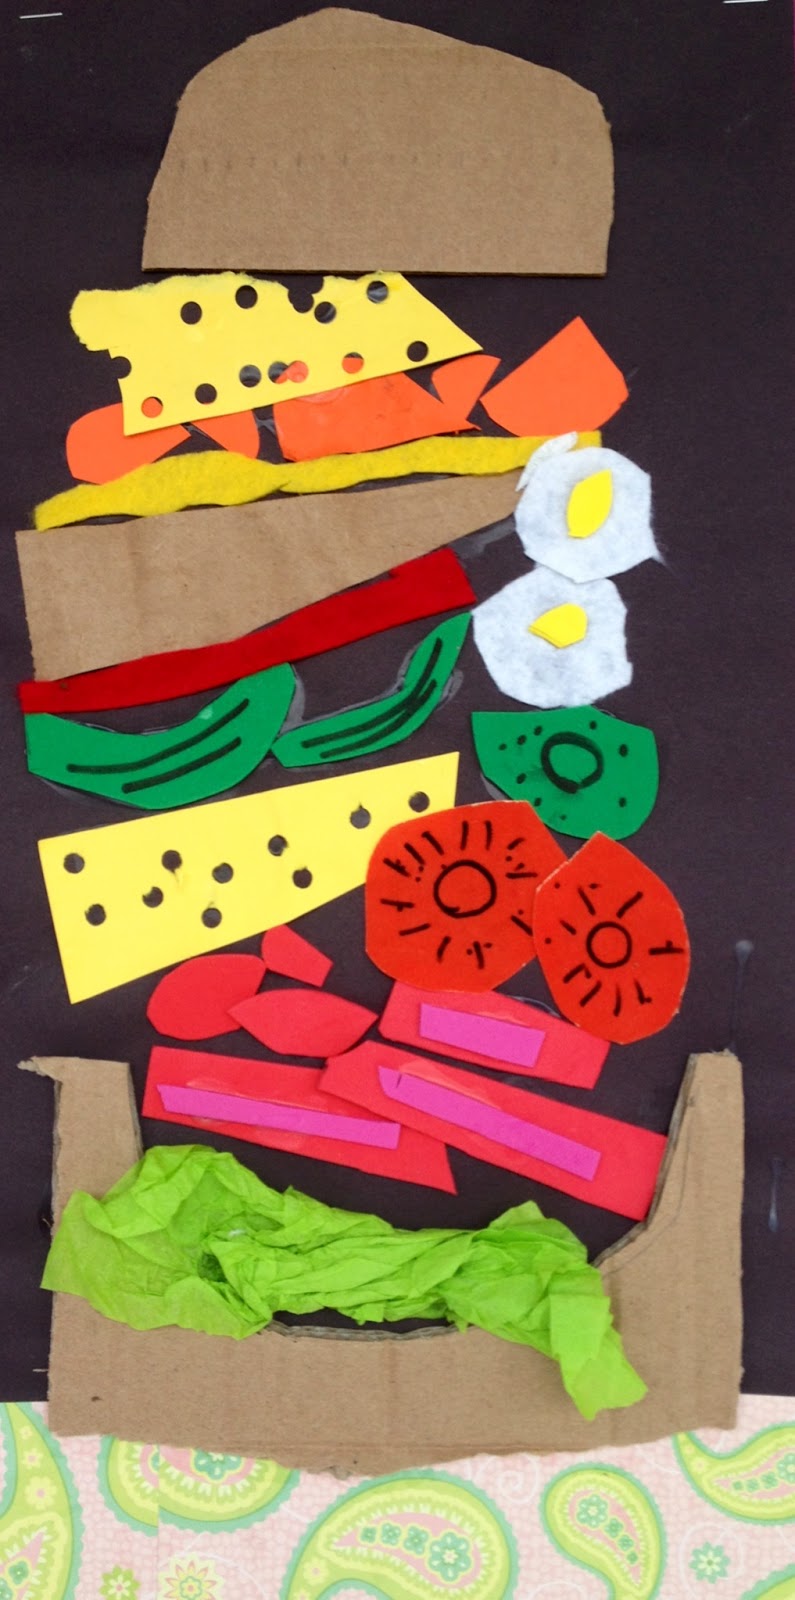
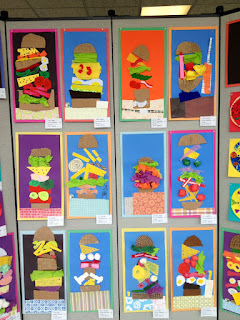
artists have been exploring texture through the creation of texture sandwiches! We brainstormed delicious sandwich ingredients, including bread, cheese, peanut butter, pickles, avocado, marshmallow fluff, bacon, etc. We made a long list on the board to give students ideas.
We began with a long piece of paper and creating a table on which to put the sandwich. Some students included a plate. Then it was time to build the sandwich, beginning with the bread and adding different materials with various textures to represent the ingredients.
Students got very creative with the ingredients, as well as how they used their materials. For example, some students used cotton balls to represent marshmallow fluff, while others turned them into eggs, and another student even wrapped them in red paper to transform them into spaghetti and meatballs!
Here are some examples of our mouth-watering creations! Some of them are on display for the Extravaganza in the connector hallway.
 |
| Axelle, 2nd grade |
 |
| Jack, 2nd Grade |
|
 |
| Ritu, 2nd Grade |
 |
| Sara, 2nd Grade |
 |
| Max, 2nd Grade |
 |
| Zohaib, 2nd Grade |
3rd grade artists created paper sculptures recently, experimenting with different ways of manipulating paper, a 2D material, to transform it into 3D forms and shapes. They then used this experience to create paper masks, utilizing some of the 3D paper techniques they learned.
First, we discussed masks and when one might wear a mask. Students shared that they had worn masks for Halloween, costume or masquerade parties, and for sports. Then students looked at a variety of masks from different tribes and countries in Africa.
We learned that many African masks are created to be worn in ceremonies and events and many have a spiritual meaning for the tribe. Often symmetrical in design, some of the designs combine animal and human characteristics. They are made of wood, metal or pottery and decorated with materials such as animal hair, straw, horns, feathers and shells.
We then began making our own masks. Beginning with the mask's shape, students folded their paper in half to create a symmetrical shape. They then added details, such as eyes, noses, hair, mouths, etc. Students used some of the techniques they had explored the previous class to bend, fold, twist and curl the paper to make it pop and stand up.
Some students made their masks to be worn, while others kept them more decorative.
Here are some examples of our paper masks! Some of them are currently on display in the connector hallway for the Extravaganza.