Monday, November 28, 2016

Arts Around the World: Hojalata Folk Art from Mexico

The first country on our Arts Around the World journey this year is Mexico. 2nd grade students began by learning about the country. 
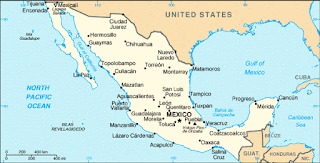
We learned that Mexico borders the United States and has tall mountains in the center of the country, deserts in the north, and rainforest in the south and east. Many students already knew that Spanish is the official language spoken in Mexico and that their currency, or money, is called pesos.
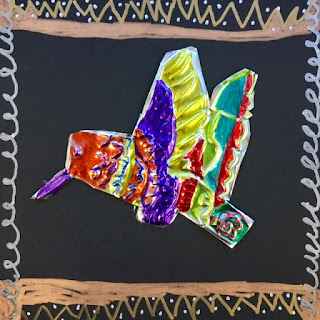
We focused on the folk art of Mexico, specifically from the Oaxaca region. Folk art is popular art forms that have been passed down through the generations. We looked at one particular form of folk art called hojalata ("oh-ha-la-ta") art, or tin art. Folk artists use tin to create these artworks, cutting and shaping the tin and using different techniques, like embossing, to create patterns and designs on the metal. Artists then add lacquer or enamel on the tin in bright colors.
After looking at examples of hojalata art, students created sketches of different animals from Mexico. Using reference images, students brainstormed a few different ideas before choosing one for their final artwork.
The following class, students learned about embossing, which is a technique where you carve, mold or stamp a design on a surface, like paper or metal, so that it stands out in relief. The two materials typically used for embossing are paper and metal. Metal embossing is used to put a design on metal sheets. The metal is pushed with an embossing tool or stylus to create a raised effect on the opposite side. 
Students taped their design on top of an aluminum sheet, so it would not move around. Then they placed this on top of a piece of felt, which provided a softer surface to work on. Using a wooden stylus, students pressed down on all their drawn lines. 
Students were amazed to see their lines coming through, creating a bumpy raised design on the opposite side of the metal sheet! After they went over all their lines once, they removed the paper on top and went over all their lines again with a blunt pencil. 
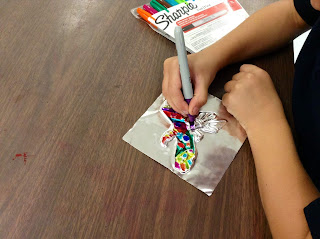
This creates a bumpy texture that you can see on both sides of the metal, but we used the side where the lines were raised. After students were done embossing, they used colored Sharpie markers to color in the areas in between the raised lines of their design. The lines created borders for their shapes, and we discussed color choice and how to use complementary colors to help their designs and patterns stand out. 
The final step involved getting the metal hot glued to a background color, creating a frame for their work. Below are some examples of our finished embossed hojalata artworks:
Wyatt, 2nd Grade (McCarthy)
Ellian, 2nd Grade (Hinds)
Zaol, 2nd Grade (Hinds)
Perin, 2nd Grade (O'Connor)
Nico, 2nd Grade (O'Connor)
Lily, 2nd Grade (Hinds)
Katie, 2nd Grade (McCarthy)
Jashua, 2nd Grade (McIsaac)
Sofia, 2nd Grade (O'Connor)
Sophie, 2nd Grade (Pearse)
Zayn, 2nd Grade (O'Connor)

Thursday, November 10, 2016

Printing Robots

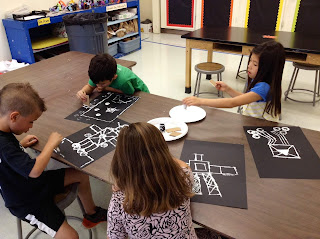
1st grade students recently created printed robots, using cardboard and recycled materials to print or stamp paint on paper. Many students connected this to the cityscape prints they made as Kindergarten students! To print, we dipped the cardboard into the paint, then pressed it down on the paper and lifted it up to make a mark. 
We connected out lines together to make shapes to form our robot's body. We thought carefully about what different parts we wanted to add to our robot. Students also focused on using the whole paper and make their robot nice and big! 
After our robots dried, the following week students used oil pastel to add color to their robot. We focused on the robot's body and experimented with layering and blending oil pastel colors together. 

We also talked about what our robots could do. Some of the robots help with homework and chores, clean your room, protect people, do cartwheels, and collect data for scientists at NASA! Here are some of our robots and their special jobs, below:
Carson, "My robot makes me dinner, like pasta with meat sauce." 
1st Grade (Torchio)
Graham, "My robot collects data for scientists at NASA." 
1st Grade (Massa)
James, "My robot helps me get out of bed in the morning." 
1st Grade (Mandile)
Lucas S., "My robot does everything!" 
1st Grade (Salvucci)
Mane,"My robot helps me do my homework."
1st Grade (Landay)
Bella, "My robot brings me to the pool."
1st Grade (Massa)
Noa, "My robot does cartwheels." 
1st Grade (Torchio)
Aideen, "My robot just sleeps." 
1st Grade (Salvucci)
Dalton,"My robot does everything I want."
1st Grade (Mandile)
Megan, "My robot cleans my room."
1st Grade (Massa)

Tuesday, November 8, 2016

Featured in the News!

Our 2nd grade Arts Around the World curriculum collaboration was recently featured in the Watertown Tab and Watertown News! Kendra Foley, a parent and Vice Chair of the School Committee, interviewed Ms. Patashnick and myself for the articles!

Music and art lessons take shape at the Hosmer Elementary in Watertown 

Hosmer Teachers Bring Together Art, Music for ‘Arts Around the World’ Lesson

Wednesday, November 2, 2016

Radial Symmetry Name Designs

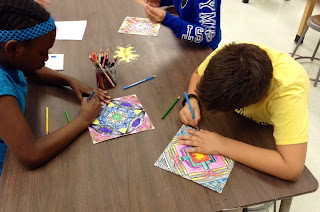
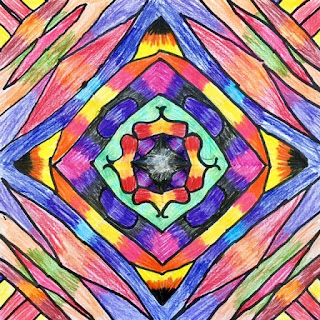
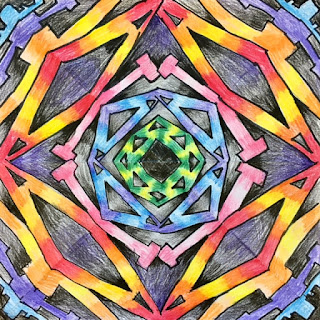
To start off the year, 5th grade artists created designs using their name! To begin, we learned about radial symmetry, which is symmetry around a central point. 
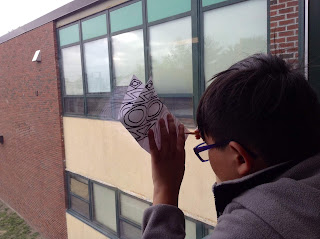
Next, students folded a square piece of paper into triangles before creating a name design, stretching their letters to fit the triangular shaped space. Some students used block or bubble letters and other students wrote their name using lines. The most important part was making the letters stretch to touch the edges of the triangle, since that helps the letters connect together as they are repeated. Students then traced over their design with a Sharpie marker and by flipping parts of the paper over each other, were able to trace their original design to repeat it in all the remaining triangles. The large windows in the connector hallway acted as a giant light box!
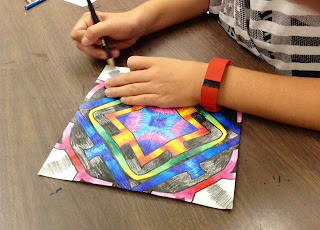
After they completed this step, students unfolded their paper to see their radially symmetrical name design repeated all the way around. Students then added color to their design using colored pencil. 
Students used a technique called gradation, which is the visual technique of gradually transitioning from one color to another. Blending is key to this technique. Students also learned about analogous colors, which are three colors that are next to each other on the color wheel.  
Students utilized analogous colors when using gradation to better demonstrate the transition between colors. They also worked hard to cover all of the paper and apply even pressure to their colored pencils to get bright, bold colors. 
Some examples of our finished radial symmetry name designs are below -- can you see the name of each artist in their design?
Anna M., 5th Grade (Twomey)
Chris, 5th Grade (Bellis)
Chloe, 5th Grade (Domermuth)
Ashlynne, 5th Grade (Bellis)
Anon, 5th Grade (Domermuth)
Colin, 5th Grade (Bellis)
Lily, 5th Grade (Twomey)
Mateo, 5th Grade (Bellis)
Maya, 5th Grade (Bellis)
Vinny, 5th Grade (Psychoghios)
Rosha, 5th Grade (Twomey)
Natalie, 5th Grade (Bellis)
Naomi, 5th Grade (Domermuth)
Molly, 5th Grade (Bellis)