Showing posts with label Three Dimensional. Show all posts

Tuesday, April 23, 2019

Plaster Masks

Recently 5th grade artists created plaster masks, which took us several weeks. The process involved designing their mask, creating the mask form out of plaster strips, painting their mask and writing an artist statement to accompany their mask on display. 
Left to right: Pixabay, “mask” CC by cisc1970 via Flickr, Pixabay
We began by discussing masks, why we wear masks, and learning about masks around the world. Students connected masks to Halloween, as well as masquerade parties and even sports. We talked about how masks can help you hide your identity, or assume a different one. They can also help protect your face, or just be worn for fun. We learned that masks have a long history and have been created, used, and worn by cultures all over the world. They are also made from a variety of different materials. 
For example, in ancient Egypt, masks were used to dress the faces of the dead. Royal death masks were made of gold and bronze and meant to look like the person. In Japan, samurai masks were designed to instill fear in opponents, as well as protect the wearer. They were often made of iron and leather. In Italy, during the Carnival Festival in Venice, elaborate masks are worn to provide mystery. And in West Africa, masks are used in religious ceremonies to communicate with spirits and ancestors. Many are made with wood, ivory or clay. 
After learning about masks, students sketched out design ideas for their own plaster mask. Many students were inspired by popular culture, super heroes, symbols, and sports. We also cut plaster strips to prepare for mask making. 
Mask making was done in two sessions, with half the class making their mask one week, and half the class making their mask the following week. Students also worked in pairs to help a partner complete their mask within our 40 minute art class. To make their plaster mask, students began with a plastic mask form that was covered with Vaseline, so that their finished mask would slip off easily when dry. Students dipped pieces of dry plaster in water, then placed them on their plastic mask form and smoothed them with wet fingers to make the plaster come out and cover the holes. 
Students made sure to overlap their strips and could choose whether to leave the eye holes open or closed, as well as the mouth. This depended on their design. Students also made sure to smooth the plaster pieces together to make the top layer the smoothest surface on which to paint. After three layers of plaster, the masks were left to dry. 
After our plaster mask making sessions, students got their dry mask back and were ready to paint! We used acrylic paint (instead of tempera paint, which we usually use) so that they paint would stay on and not flake off the mask later. Students noticed that the acrylic paint dried quickly. 
Students spent two to three classes painting their masks, considering how to paint their design in layers so that they could add details on top. Depending on the design, some students had to paint their mask all one color, or two colors, before adding details on top. Other students began with the white base of the mask and painted details directly on top. 
On our last mask making class, student added extra details using a variety of different materials. Some students added ears to their animal mask, or feathers to a masquerade inspired mask. The following class we worked on artist statements for our masks. An artist statement is a written explanation of an artist's work. You can tell the viewer about the motivation and inspiration behind your design, how you made your work, and any additional information you want the viewer to know. Students typed up their artist statements so they could be accompany their mask on display. Below are some examples of our plaster masks on display!
Mrs. Bellis's Class
Ms. Domermuth & Ms. Fantasia's Class
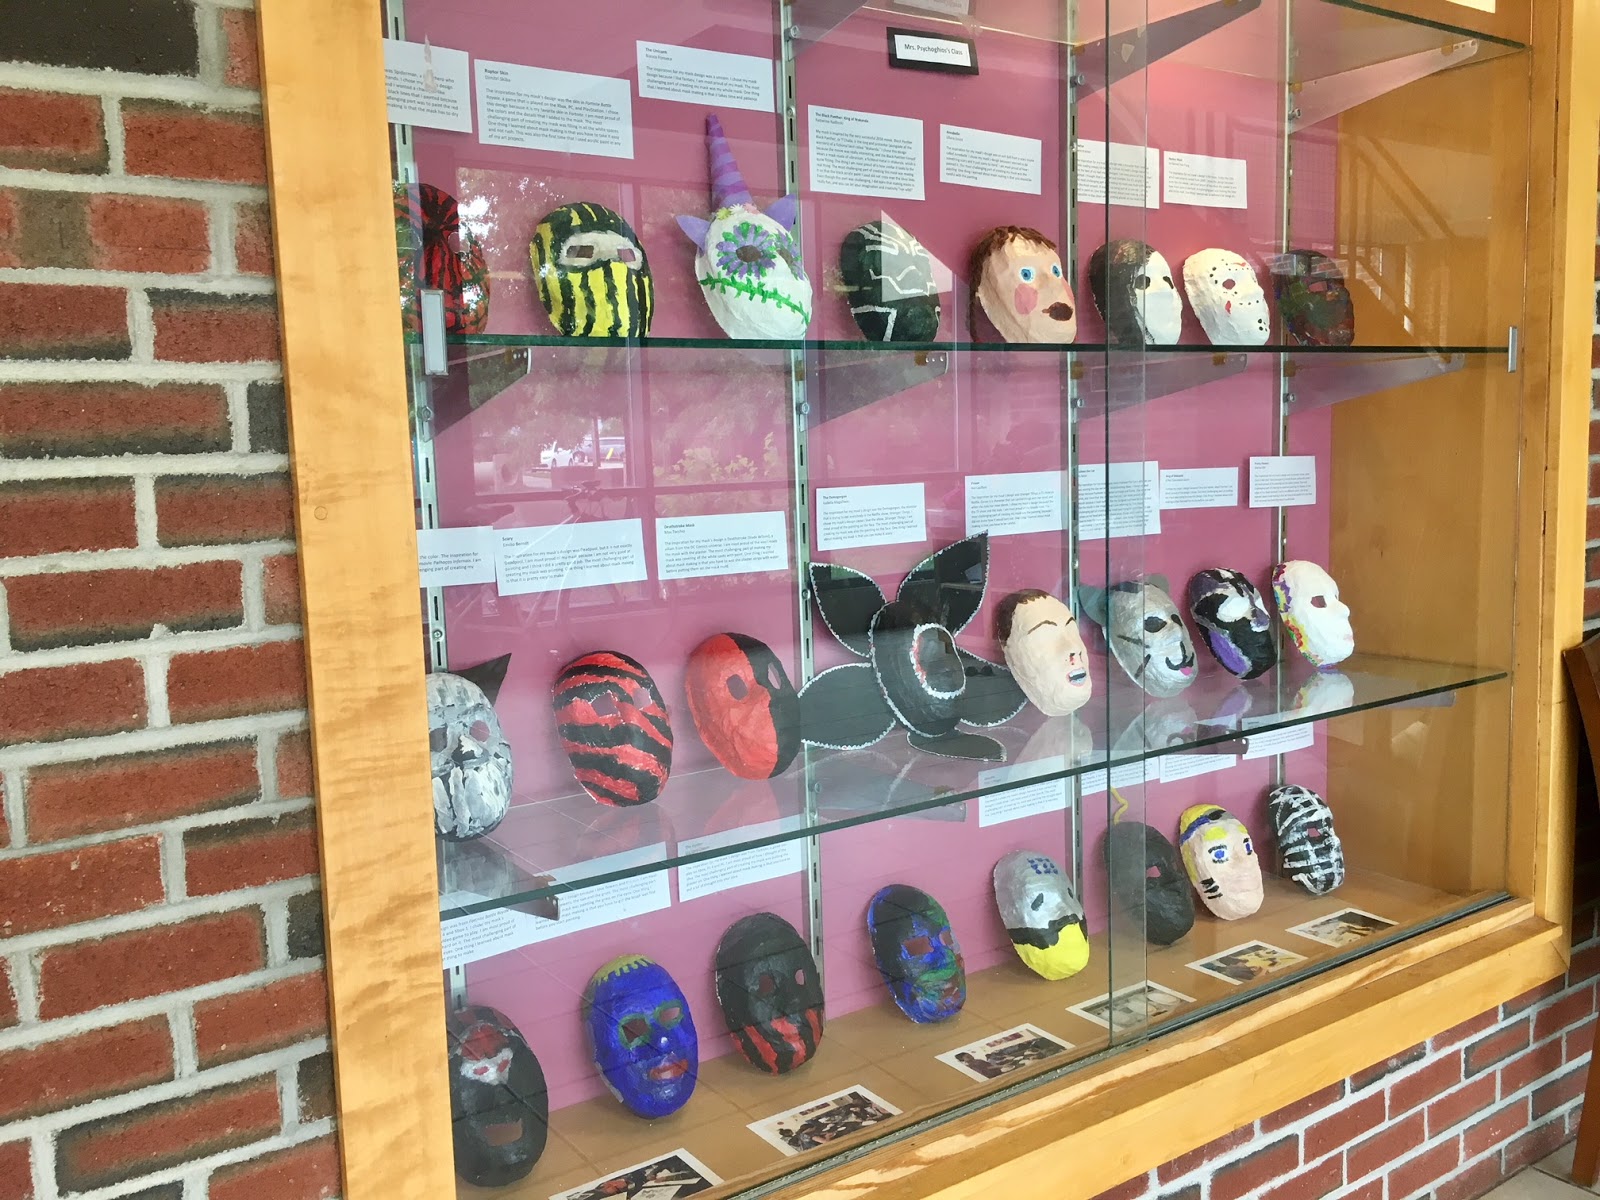
Mrs. Psychoghios's Class
Mr. Twomey's Class


Friday, June 22, 2018

Clay Projects

This May and June, students in several grade levels have been working with and making pieces out of clay! 1st grade artists made pinch pot monsters, 3rd grade artists made coil pots, 4th grade artists made coil pots with lids, and 5th grade artists made independent clay projects. Clay comes from the Earth and is made up of different minerals. We learned that clay goes through many stages to become a ceramic object, starting with wet clay, drying out in the air to become bone dry, then getting fired in the kiln the first time to become bisque.
For pinch pot monsters, 1st graders started with a pinch pot. Students pushed their thumbs in the middle of the clay ball and then pinched around in a circle to create a pot or bowl shape. Then, we turned them on their side and added details to create monsters. Some students chose to add tongues, teeth, multiple eyes, and horns. Students made sure to score or scratch up the clay and use slip to add their smaller detailed pieces to their pinch pot, so that everything would stay on. 
3rd graders made round coil pots and 4th graders made triangular shaped coil pots. The coil pot began with a flat bottom and rolling the clay into coils around the sides to form the walls of the pot. Students made sure to score and slip the coils. 4th graders also added slab lids to their triangular coil pots, like pizzas, cake and watermelon.
5th graders were able to choose from all these options and create their own independent project that took the form of a pot, flat slab or slab box. They began by sketching out their idea in their sketchbooks. The slab box involved the most measuring and scoring all the pieces. To make the slab box, students rolled out the clay to create flat pieces or slabs and cut them using a template to form the bottom and sides of the box. They assembled the sides by scoring the base and each side and using slip to attach everything together and smooth all the edges. 
After getting bisque fired in the kiln, students used glaze to add color to their monsters. Students moved to different color stations depending on which colors of glaze they wanted to use and painted three layers of each color. Students had to carry their coil pots to the different stations very carefully! We got our projects back after they had been fired again, to melt the glaze and make it shiny. Below are examples of our various clay projects: 
Edwin, 4th Grade (Cikacz)
Audrey L., 1st Grade (Massa)
Lily L., 4th Grade (Mattson)
Mia Z., 4th Grade (Doherty)
Jaylyn, 5th Grade (Twomey)
Sophie, 5th Grade (Bellis)
Brady, 5th Grade (Domermuth Fantasia)
Breanna, 5th Grade (Twomey)
Graham, 1st Grade (Massa)
Sila, 5th Grade (Bellis)
Anna, 5th Grade (Twomey)
Emily, 5th Grade (Twomey)
Finn, 1st Grade (Mandile)

Monday, June 4, 2018

Plaster Masks

This spring, 5th grade artists created plaster masks, which took us several weeks. The process involved designing their mask, creating the mask form out of plaster strips, painting their mask and writing an artist statement to accompany their mask on display. 
We began by discussing masks, why we wear masks, and learning about masks around the world. Students connected masks to Halloween, as well as masquerade parties and even sports. We talked about how masks can help you hide your identity, or assume a different one. They can also help protect your face, or just be worn for fun. We learned that masks have a long history and have been created, used, and worn by cultures all over the world. They are also made from a variety of different materials. For example, in ancient Egypt, masks were used to dress the faces of the dead. Royal death masks were made of gold and bronze and meant to look like the person. In Japan, samurai masks were designed to instill fear in opponents, as well as protect the wearer. They were often made of iron and leather. In Italy, during the Carnival Festival in Venice, elaborate masks are worn to provide mystery. And in West Africa, masks are used in religious ceremonies to communicate with spirits and ancestors. Many are made with wood, ivory or clay. 
After learning about masks, students sketched out design ideas for their own plaster mask. Many students were inspired by popular culture, super heroes, symbols, and sports. We also cut plaster strips to prepare for mask making. Mask making was done in two sessions, with half the class making their mask one week, and half the class making their mask the following week. The class also came early to art class, so that we would have enough time to complete three layers of plaster. Thank you to the 5th grade teachers for making extra time for this project! 
To make their plaster mask, students began with a plastic mask form that was covered with Vaseline, so that their finished mask would slip off easily when dry. Students dipped pieces of dry plaster in water, then placed them on their plastic mask form and smoothed them with wet fingers to make the plaster come out and cover the holes. 
Students made sure to overlap their strips and could choose whether to leave the eye holes open or closed, as well as the mouth. This depended on their design. Students also made sure to smooth the plaster pieces together to make the top layer the smoothest surface on which to paint. After three layers of plaster, the masks were left to dry. 
After our plaster mask making sessions, students got their dry mask back and were ready to paint! We used acrylic paint (instead of tempera paint, which we usually use) so that they paint would stay on and not flake off the mask later. Students noticed that the acrylic paint dried quickly. 
Students spent two to three classes painting their masks, considering how to paint their design in layers so that they could add details on top. Depending on the design, some students had to paint their mask all one color, or two colors, before adding details on top. Other students began with the white base of the mask and painted details directly on top. On our last mask making class, student added extra details using a variety of different materials. Some students added ears to their animal mask, or feathers to a masquerade inspired mask. 
The following class we worked on artist statements for our masks. An artist statement is a written explanation of an artist's work. You can tell the viewer about the motivation and inspiration behind your design, how you made your work, and any additional information you want the viewer to know. Students typed up their artist statements so they could be accompany their mask on display. Below are some examples of our plaster masks on display!