Thursday, November 30, 2017

Pumpkins Painting

3rd grade artists painted pumpkins this fall! We began by exploring the color orange. We recalled that to make orange, a secondary color, you mix red and yellow, which are primary colors. We noticed that there are actually many different kinds of orange. We experimented with what might happen if we added more yellow or more red. We also used white to make tints of orange, and black to make shades of orange. We tried to see how many different kinds of orange we could mix, and painted them on paper. 
The following class, we got our orange explorations back and cut out shapes from the colors we created. We discussed the difference between geometric and organic shapes and students cut out both kinds of shapes. We glued them to a larger mural, trying to show the wide variety of orange. We organized the pieces so it went from light to dark. 
Now that we knew how to mix many different kinds of orange, we began to paint pumpkins! Students drew a pumpkin that was placed in the middle of their table -- big thanks to Ms. Patashnick, our music teacher, for the pumpkins! Looking carefully at its shape and lines, students drew their pumpkin from observation. We noticed the lines of the pumpkin followed its curved shape, which made our pumpkins look more round. 
The following class, students looked at the pumpkins again and noticed that there are lighter areas where the light hits the pumpkin and darker areas that are in shadow. Thinking back to the lighter and darker oranges they had mixed, students painted their pumpkins from observation, noting where it was lighter and darker on their pumpkin. We also mixed greens for the stem. 
We also included the shadow that the pumpkin cast on the table. We noticed that it was darkest closest to the pumpkin, and a curved shape similar to the pumpkin. Students mixed a darker color to use for the shadow, and also painted the background so that the pumpkin looked like it was sitting on something. Below are some examples of our painted pumpkins!
Aaron, 3rd Grade (Monfette)
Ellian, 3rd Grade (Monfette)
Elizabeth, 3rd Grade (DeBaie & Nickl)
Evelyn, 3rd Grade (Fletcher)
Finnley, 3rd Grade (Fletcher)
Isabel, 3rd Grade (Fletcher)
Lily, 3rd Grade (Fletcher)
NJ, 3rd Grade (DeBaie & Nickl)
Wyatt, 3rd Grade (Donato)
Kemi, 3rd Grade (Donato)
Noah, 3rd Grade (Donato)
Willa, 3rd Grade (Donato)

Wednesday, November 15, 2017

Fall Leaves Watercolor Resist

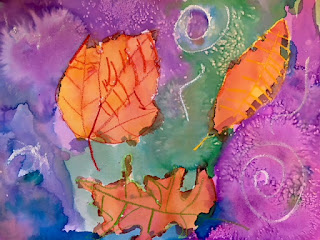
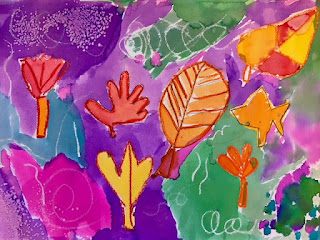
Recently 1st grade artists looked at fall leaves and noticed that the green leaves change to red, orange and yellow when it becomes fall. We noticed that these are all warm colors. We began by looking at real leaves, as well as photographs of leaves, that have changed color during the fall. Students drew several large leaves on their paper, using oil pastels.
Then we painted them using watercolor paint in warm colors -- red, orange and yellow. The oil pastel lines of the leaves show through the watercolor paint which demonstrates resist, an effect students learned about last year in kindergarten. 
Students also learned about a watercolor technique called wet-on-wet, which involves painting the paper with water first and then dropping or painting with watercolor on top. The watercolor blooms or spreads because the paper is already wet which creates a blurry effect. Students enjoyed experimenting with this technique, and many found its effect "magical"!
The following class, we added some lines with white oil pastel to the background and then painted the background with cool colors of watercolor paint. Students experimented with wet-on-wet and also learned about another watercolor technique: using salt sprinkled on top of the wet paint. The salt absorbs the color from the paint, creating a white spot underneath as it dries and making a interesting texture.
Students enjoyed combining some of the watercolor techniques they learned about during this project. After our artwork had dried, the salt was brushed off and students were excited to see the effects of the salt, as well as the wet-on-wet. Below are examples of our warm and cool color fall leaves:
Alexis, 1st Grade (Salvucci)
Amelia, 1st Grade (Mandile)
Graham, 1st Grade (Massa)
Lucas F., 1st Grade (Landay)
Lucy, 1st Grade (Salvucci)
Mohammad, 1st Grade (Landay)
Mohan, 1st Grade (Massa)
Nasir, 1st Grade (Landay)
Naysa, 1st Grade (Massa)
Nirvaan, 1st Grade (Mandile)
Rishi, 1st Grade (Landay)
Violet, 1st Grade (Massa)
Xavier, 1st Grade (Salvucci)
Eden, 1st Grade (McIsaac)
Gabi, 1st Grade (McIsaac)
Joshua, 1st Grade (McIsaac)

Thursday, November 2, 2017

Radial Symmetry Name Designs

To start off the year, 5th grade artists created designs using their name! To begin, we learned about radial symmetry, which is symmetry around a central point. We actually learned about this concept in 3rd grade when we made our color wheel snowflakes.   
Next, students folded a square piece of paper into triangles before creating a name design, stretching their letters to fit the triangular shaped space. Some students used block or bubble letters and other students wrote their name using lines. The most important part was making the letters stretch to touch the edges of the triangle, since that helps the letters connect together as they are repeated. 
Students then traced over their design with a Sharpie marker and by flipping parts of the paper over each other, were able to trace their original design to repeat it in all the remaining triangles. The large windows in the connector hallway acted as a giant light box! 
After they completed this step, students unfolded their paper to see their radially symmetrical name design repeated all the way around. Students then added color to their design using colored pencil. Students used a technique called gradation, which is the visual technique of gradually transitioning from one color to another. 
Blending is key to this technique. Students also learned about analogous colors, which are three colors that are next to each other on the color wheel. Students utilized analogous colors when using gradation to better demonstrate the transition between colors. 
They also worked hard to cover all of the paper and apply even pressure to their colored pencils to get bright, bold colors. Some examples of our finished radial symmetry name designs are below -- can you see the name of each artist in their design?
Caroline F., 5th Grade (Domermuth)
Chris, 5th Grade (Bellis)
Emma, 5th Grade (Domermuth)
Iris, 5th Grade (Psychoghios)
Isabell, 5th Grade (Bellis)
Jessica, 5th Grade (Domermuth)
Kaleb, 5th Grade (Domermuth)
Kate S., 5th Grade (Bellis)
Max H., 5th Grade (Bellis)
Mia, 5th Grade (Bellis)
Nola, 5th Grade (Domermuth)
Rose, 5th Grade (Bellis)
Sila, 5th Grade (Bellis)
Yazmin, 5th Grade (Bellis)
Andrew P., 5th Grade (Twomey)
Hammad, 5th Grade (Twomey)
Hazel, 5th Grade (Twomey)
Jaylyn, 5th Grade (Twomey)
William, 5th Grade (Psychoghios)
Dorie, 5th Grade (Psychoghios)
Marwa, 5th Grade (Psychoghios)