Monday, December 17, 2018

Brazil: Romero Britto Inspired Paintings

This year in 2nd grade for our Arts Around the World curriculum, students will be learning about art and music from four different countries -- Brazil, Ghana, Japan and Scotland -- throughout the year. In art class, we will be learning about artists and art forms from that country and in music class with Ms. Patashnick, students will be learning about musicians, music and dance from that country.
Starting with our exploration of Brazil, we learned a few facts about Brazil such as the capital being the city of Brasilia, the main language spoken being Portuguese and soccer being a very popular sport there! We also learned that many Hosmer students and families are from Brazil, have family there, and speak Portuguese at home!
Romero Britto, Children of the World (2006)
In art, we learned about contemporary Brazilian artist, Romero Britto. Britto was born and raised in Brazil and now lives and works in Miami, Florida. He still makes artwork today and is well known for his colorful art, which is on display in many museums around the world and also in public spaces, such as airports, parks, and shopping areas. 
Romero Britto, A Brand New Day (2006)
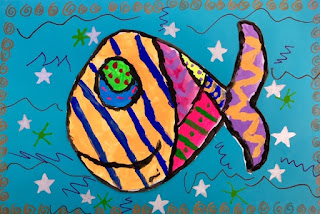
We looked at some examples of his artwork and students noticed the bold lines, colorful patterns, shapes, and fun, playful nature. We brainstormed our own ideas for artwork, inspired by Britto's style. 
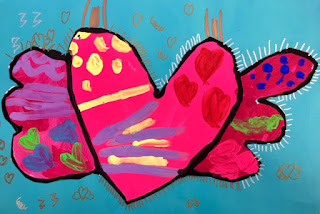
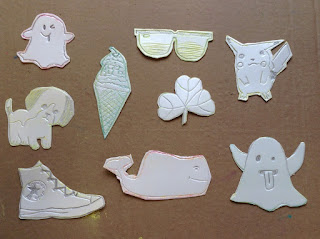
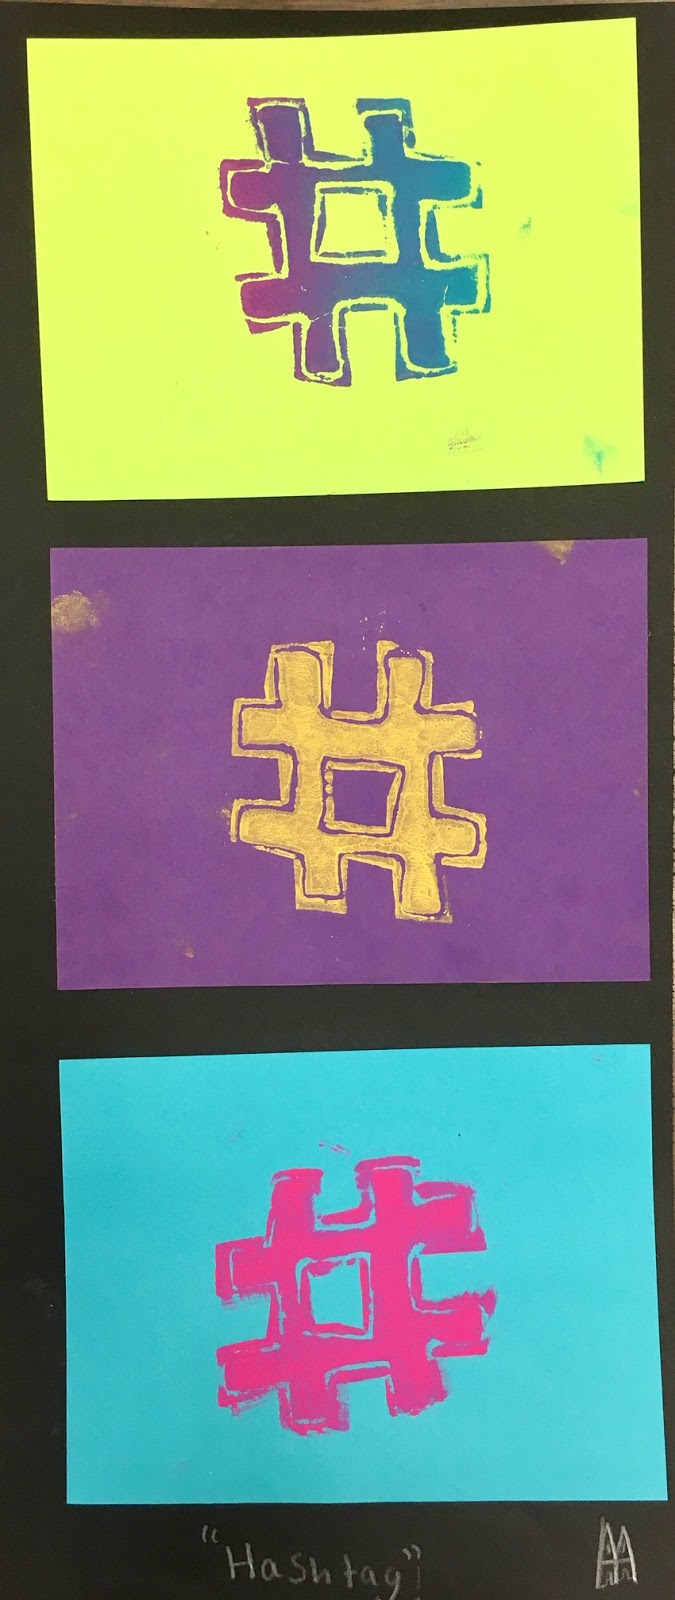
Students came up with four different sketches for ideas, focusing on one object -- such as a shape, symbol, food, animal, or alphabet letter -- and adding different lines, shapes and patterns to that design. Many students were inspired by Romero Britto's hearts with wings, as well as soccer balls, dogs, cats, ice cream cones, and fruit!
The following class, students then selected their favorite sketch and drew it larger on paper in order to paint. Using bright colors, including fluorescent colors, students painted the different areas of their chosen object. 
After letting that dry, during the following class we added patterns on top of these areas. We learned about complementary colors, which are colors that are across from each other on the color wheel and help each other stand out. Students demonstrated at least one complementary color pairing with their pattern painting. 
After finishing the patterns, students used black paint to outline their object and separate the areas of different pattern within their work, like Romero Britto does in his artwork. This took some careful painting, and students were very focused!
As a final step, students cut out their design once it was dry and glued it onto a background. 
We chose the background paper color carefully, looking at which colors would help our painting stand out. Using colored and metallic Sharpie markers, we added patterns and designs to the background. Below are examples are our finished Romero Britto inspired artwork:
Arlo, 2nd Grade (O'Connor)
Audrey L., 2nd Grade (Hinds)
Emily, 2nd Grade (Stone)
Gabi, 2nd Grade (O'Connor)
Hailey, 2nd Grade (Stone)
Kenji, 2nd Grade (McCarthy)
Lazaros, 2nd Grade (McCarthy)
Liliana, 2nd Grade (O'Connor)
Mie, 2nd Grade (O'Connor)
Nico, 2nd Grade (Pearse)
Nina, 2nd Grade (McCarthy)
Nirvaan, 2nd Grade (McCarthy)
Seta, 2nd Grade (Pearse)

Friday, November 30, 2018

Pop Art Inspired Printmaking

4th grade artists started off the year by learning about the Pop Art movement, which began in the U.S. in the 1950's. Artists focused on objects and scenes from everyday life and popular culture, borrowing techniques from commercial art and popular illustration, like comics and cartoons. We looked at a few examples of screen prints made by Andy Warhol, who made multiple prints of his artwork. A lot of his art featured commercial products that were mass produced, so he chose to mass produce his artwork, as well. 
Andy Warhol, Campbell's Soup Cans (1962) 
After sharing our observations, we discussed what popular culture means to us today. Each class made a list on the whiteboard, which included things like sports teams, music, video games, social media and fashion. Then students brainstormed four different ideas for a print, featuring pop culture imagery that was important or meaningful to them. Students were also given reference images for inspiration, with sports team logos, emojis and cartoon characters, among other things.
Each student selected one of their four ideas to make into a print that would be repeated multiple times. After placing their chosen drawing on top of a piece of styrofoam, students traced over their drawing with a wooden stylus. Then they removed the paper and went over their drawing again, to make the lines deeper. The final step was to go over their lines one more time with a blunt or dull pencil, to make their lines a little wider. Then we cut around the shape to form our printing plate.
On the first day of printing, we learned about the printmaking process and the steps involved. Students pulled their first prints, using yellow ink on purple paper, to get a feel for how much ink is appropriate and how long to roll it out with the brayer. We set up our tables with a bench hook and brayer to roll out ink. Everyone folded a piece of manila paper so that there was a clean side and a messy side. We rolled out the ink using the brayer, listening for a sticky sound that told us that the ink was evenly spread out and ready. We placed the plate on top of the messy side of our manila paper and rolled the ink on top of our plate carefully. We moved it to the clean side and pressed a piece of colored paper on top. Using our hands to gently rub, we then flipped the paper and over and pulled it apart from the plate to reveal their print. 
For their second printmaking class, students were able to choose their own color of ink and paper. Students made multiple copies with their plate, which the printmaking process allows us to do. 
On the third printing day, students created prints using two colors of ink to do a rainbow roll. Using two different colors that met in the middle to form a new color, the rainbow roll gave the prints a gradation effect. Many students enjoyed this effect and their prints from this day. 
After our printing classes, students selected our three best prints and mounted them on a black background. Since we had done printmaking for three classes, students had many prints to choose from! Students thought about which prints came out the most successfully, looking at the amount of ink, and also tried to display different color combinations. Students arranged them in an order before gluing them down. After gluing down their three prints, students signed and titled their work. Many students asked each other for advice and also helped each other brainstorm creative titles! 
We did a gallery walk, so we could see everyone's finished work. Students noticed that there were some very popular subjects that came up often, such as unicorns and ghost emojis, but everyone's prints looked different. Many students appreciated the thoughtful and clever titles that their friends were able to come up with, as well! As you can see, students did an amazing job mounting their own work!
Aaron, 4th grade (Mattson)
Abena, 4th grade (Cikacz Wandicho)
Darya, 4th grade (Graves)
Ellian, 4th grade (Doherty)
Etta, 4th grade (Graves)
Evelyn, 4th grade (Mattson)
Finnley, 4th grade (Doherty)
Isabel, 4th grade (Cikacz Wandicho)
Kemiyoda, 4th grade (Mattson)
Kendyll, 4th grade (Cikacz Wandicho)
Nicolle, 4th grade (Doherty)
Noah, 4th grade (Graves)
Sofia, 4th grade (Doherty)
NJ, 4th grade (Mattson)

Tuesday, November 27, 2018

Fall Leaves Watercolor Resist

In keeping with the fall season, 1st grade artists looked at leaves and noticed that the green leaves change to red, orange and yellow when it becomes fall. We noticed that these are all warm colors. We began by looking at real leaves, as well as photographs of leaves, that have changed color during the fall. 
We noticed that some leaves had more than one color. 
Students drew several large leaves on their paper, using oil pastels, looking closely at the examples of leaves and drawing them from observation. We practiced close looking and noticed the bumpy edges of many of the leaves and the lines or veins inside. 
Then we painted our leaf drawings using watercolor paint in warm colors -- red, orange and yellow. The oil pastel lines of the leaves show through the watercolor paint, which demonstrates resist, an effect students learned about last year in kindergarten. 

Students also learned about a watercolor technique called wet-on-wet, which means the paper is wet before adding more wet paint on top. Students tried painting the paper with water first and then dropping or painting with watercolor on top, or painting a wash of one color and adding other colors on top. 
The watercolor blooms or spreads because the paper is already wet which creates a blurry effect. Students enjoyed experimenting with this technique, and many found its effect "magical"! We had to bring our artwork to the drying rack very carefully to make sure the paint stayed inside our leaves. 
The following class, we added some lines with white oil pastel to the background and then painted the background with cool colors of watercolor paint. Students experimented with wet-on-wet and also learned about another watercolor technique: using salt sprinkled on top of the wet paint. The salt absorbs the color from the paint, creating a white spot underneath as it dries and making a interesting texture. 
Students enjoyed combining some of the watercolor techniques they learned about during this project. After our artwork had dried, the salt was brushed off and students were excited to see the effects of the salt, as well as the wet-on-wet. Below are examples of our warm and cool color fall leaves:
Beatrix, 1st Grade (Landay)
Brigham, 1st Grade (Massa)
Clara, 1st Grade (Talamas)
Dylan, 1st Grade (Mandile)
Karissa, 1st Grade (Talamas)
Leo, 1st Grade (Massa)
Nathan, 1st Grade (Mandile)
Nora, 1st Grade (Massa)
Parissa, 1st Grade (Talamas)
Roslyn, 1st Grade (Salvucci)
Keegan, 1st Grade (McIsaac)
Amar, 1st Grade (McIsaac)
Nora, 1st Grade (McIsaac)
Sebastian, 1st Grade (Landay)