Friday, April 29, 2016

Abstract Cubist Self Portraits, Inspired by Picasso

After drawing their self portraits from observation, using mirrors, 3rd grade artists looked at portraits painted by Spanish artist Pablo Picasso. Students noticed that Picasso's portraits have many different shapes, the colors are not natural to a person in real life, and the facial features seemed to be at different angles. For example, one eye looks like it is looking forward and the other eye is from a side profile view.
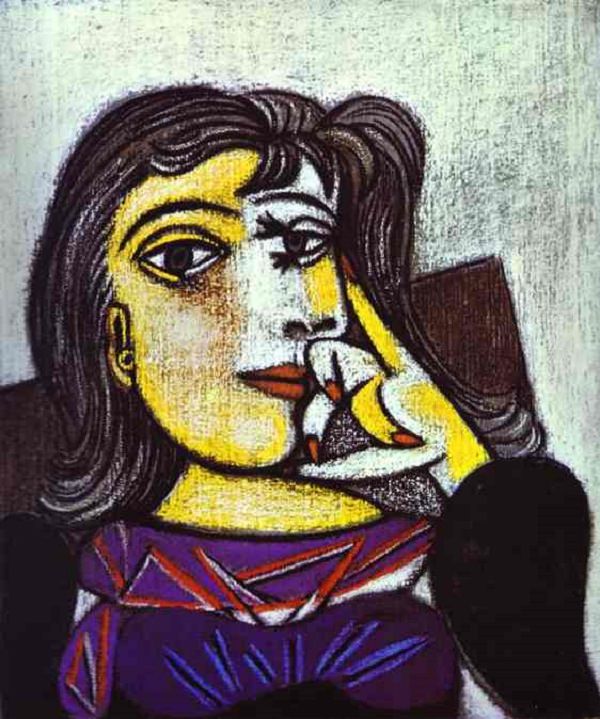
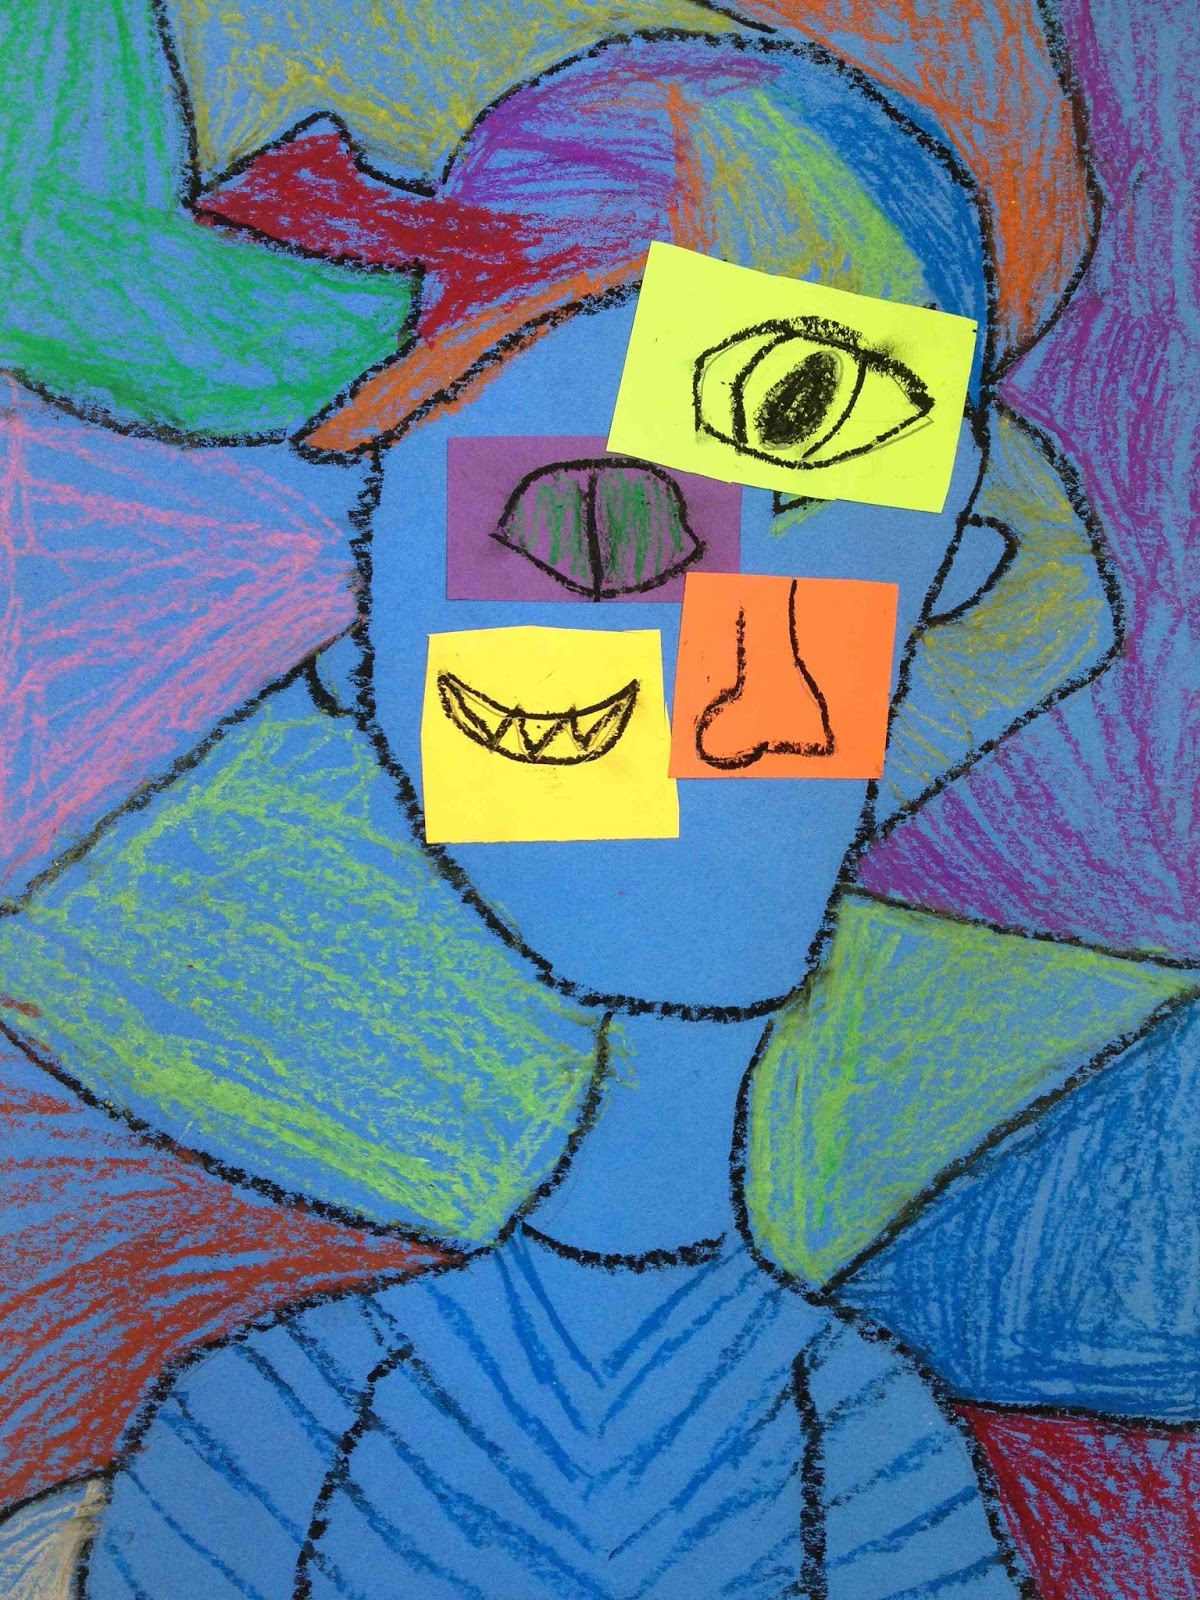
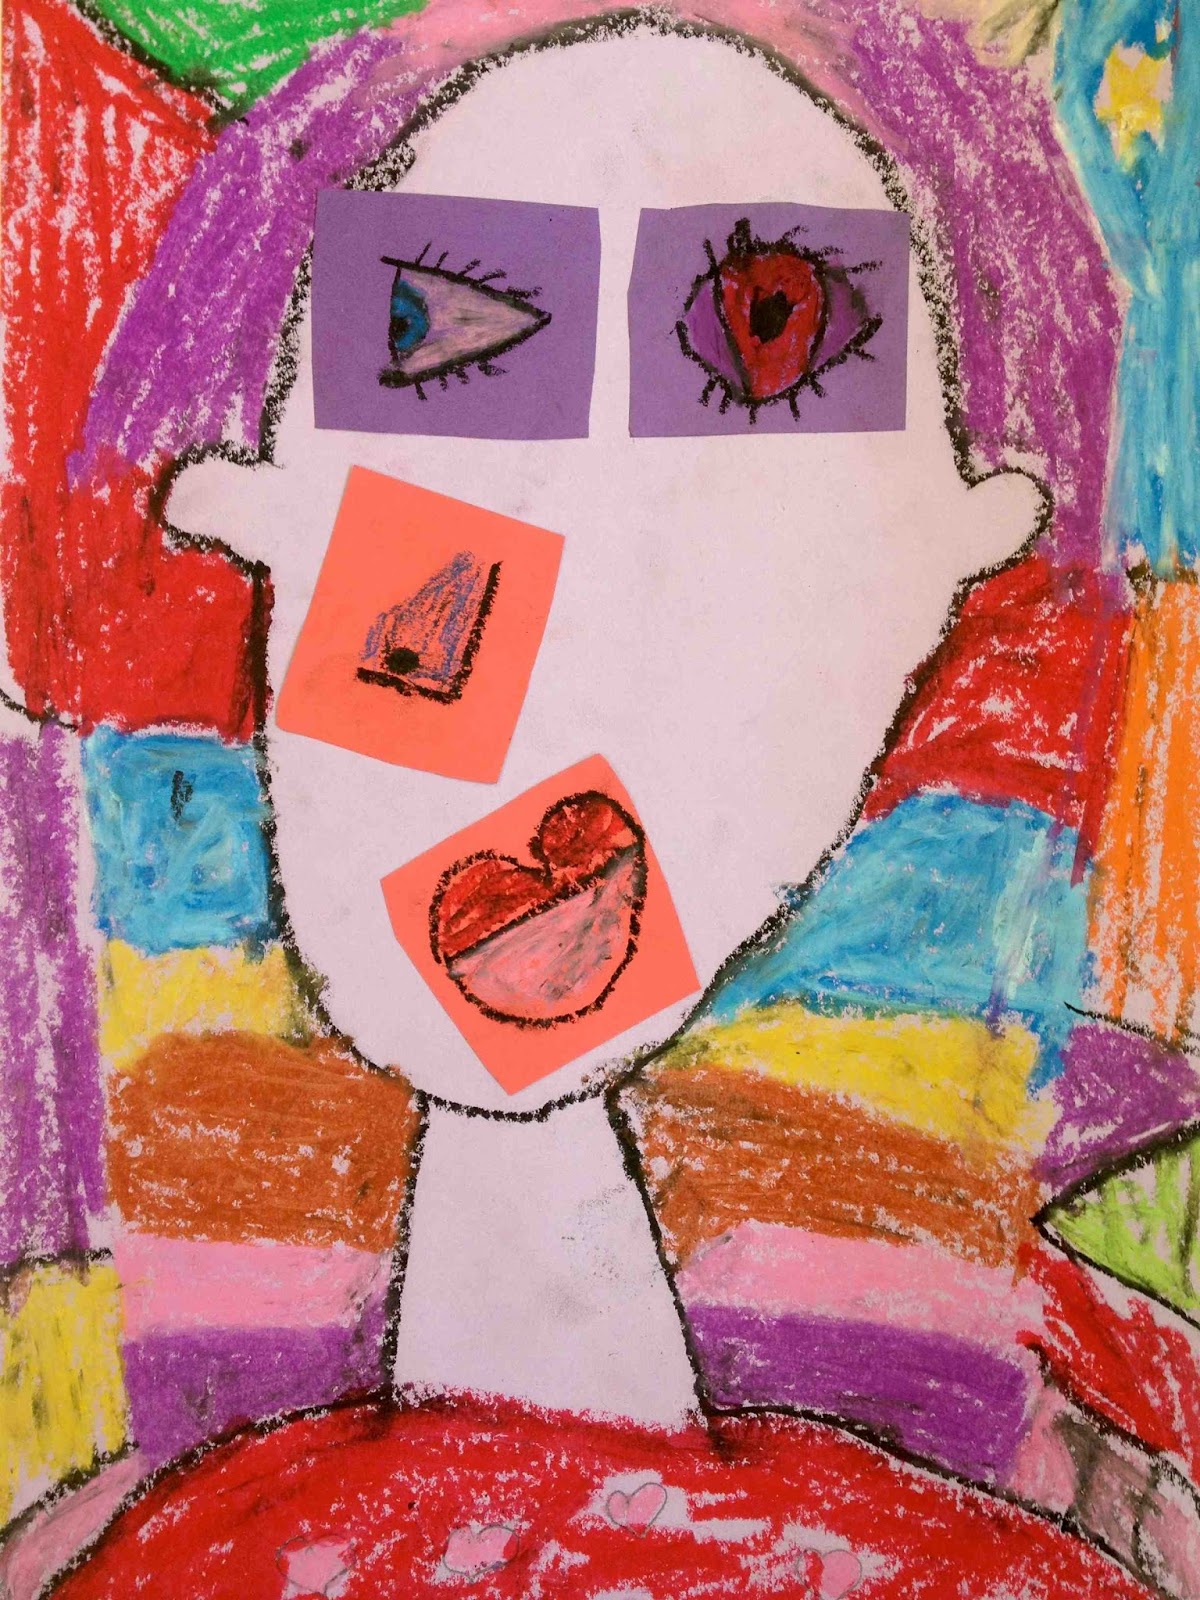
Pablo Picasso, Portrait of Dora Maar (1937)
Students learned about Cubism, an art movement developed by Picasso and another artist, Georges Braque, in the early 1900's. In Cubism, artists wanted to represent the world differently, and encourage viewers to look at the world in different ways. They would break up the subject into different geometric shapes and look at it from many different angles. We looked at other examples of Cubist artwork, including still life paintings and landscapes, and noticed that while the subject was often recognizable, they were not necessarily realistic.
Students then started their own Cubism inspired self portraits. We started off similarly to our self portrait drawings from observation, with a head, neck and shoulders. This time, students had more freedom to play around with shape and size. Some students chose to represent their hair style very differently! Using oil pastels, students colored in their hair and shirt, but left their faces blank. 
Next class, students used different colored pieces of paper to add their facial features, considering how they could make them abstract and different from the way they might normally approach them. We experimented with making one eye looking forward and the other looking sideways
Students used many different colors and techniques with their oil pastels, blending colors together and selecting complementary colors to help details stand out. After arranging the pieces within their face, students glued them down. Then they added a background, adding different areas of color. Here are some examples of our creatively abstract, Cubist style self portraits:
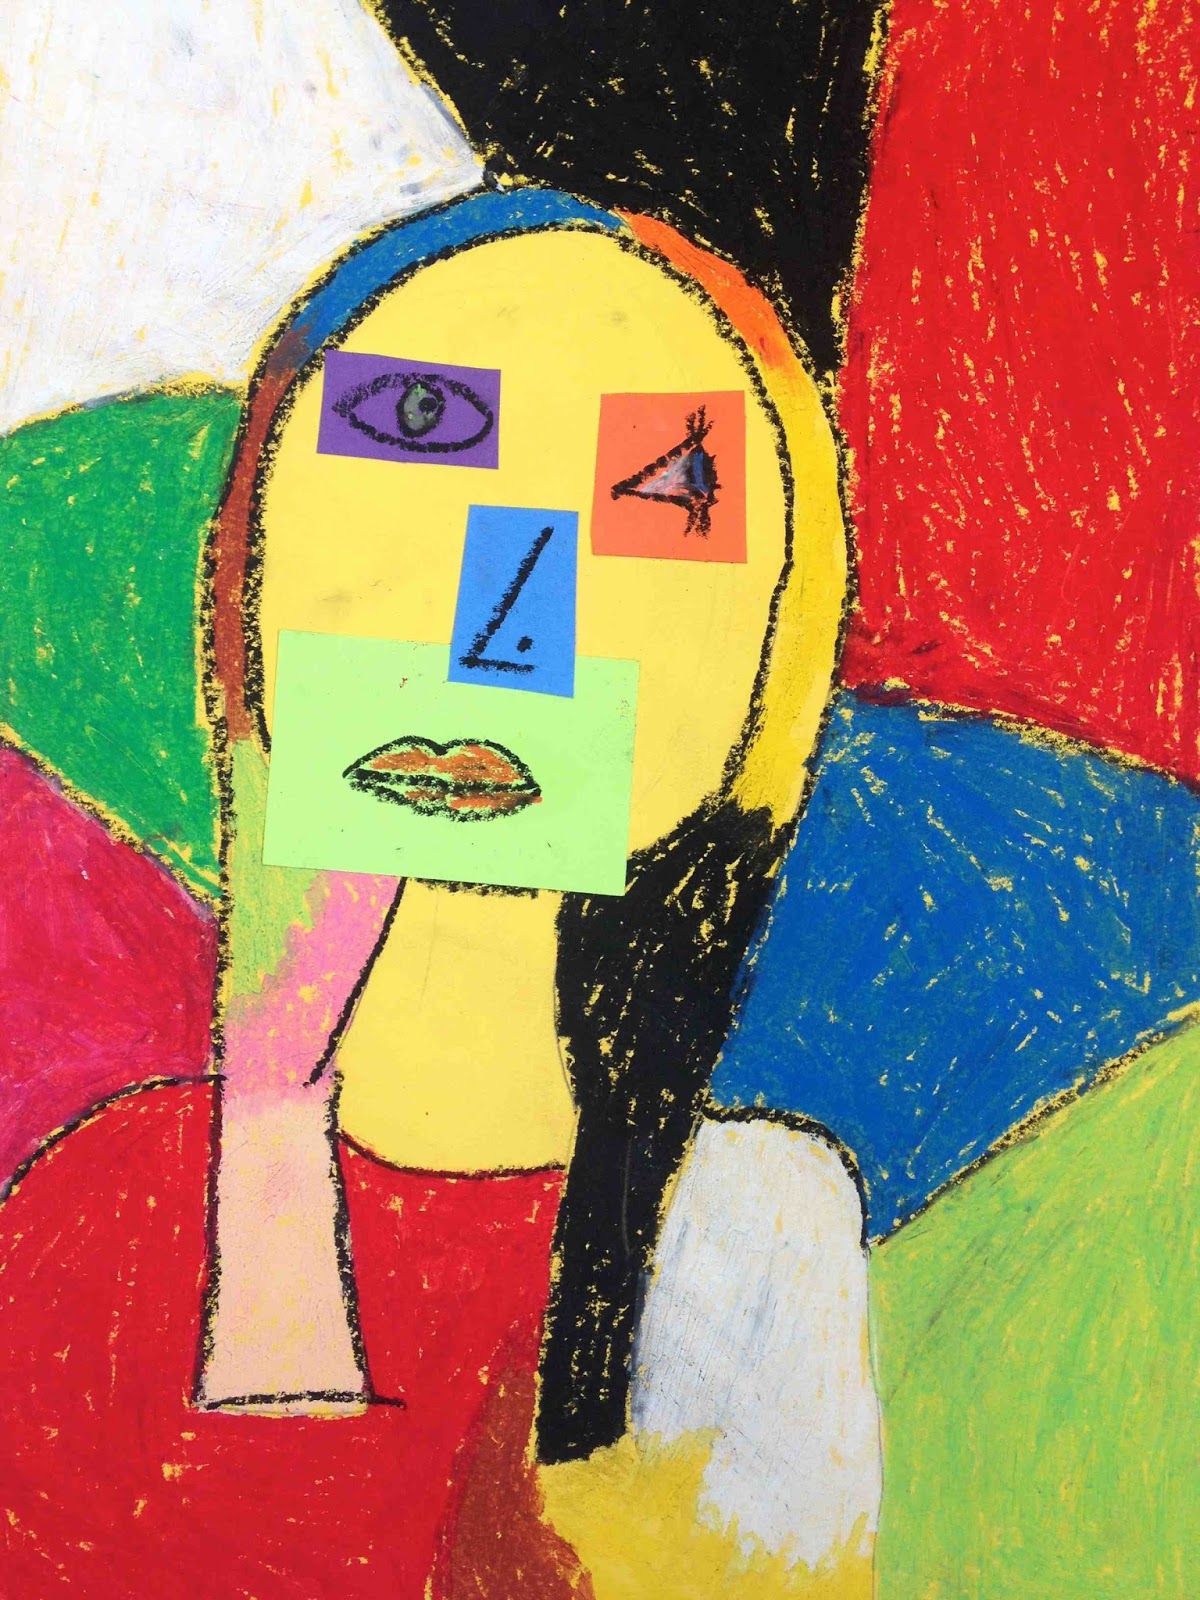
Dorie, 3rd grade (Lutz)
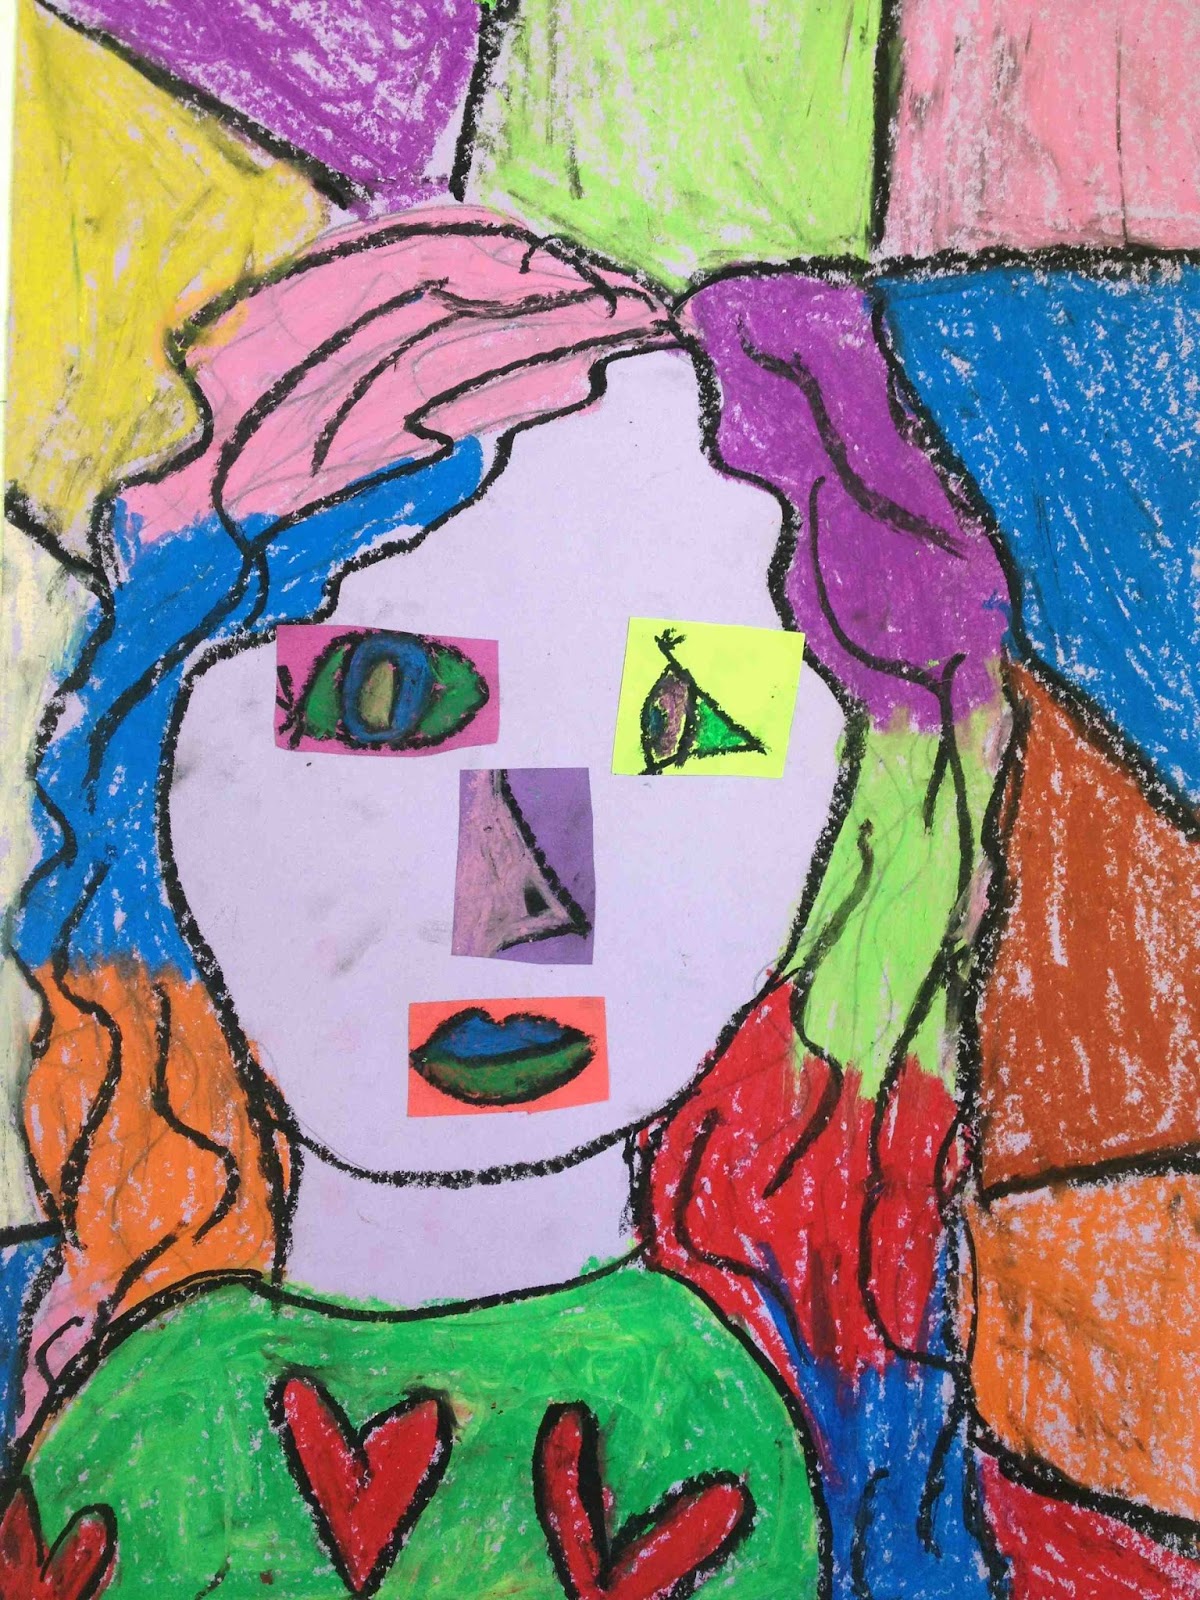
Kiran, 3rd grade (Monfette)
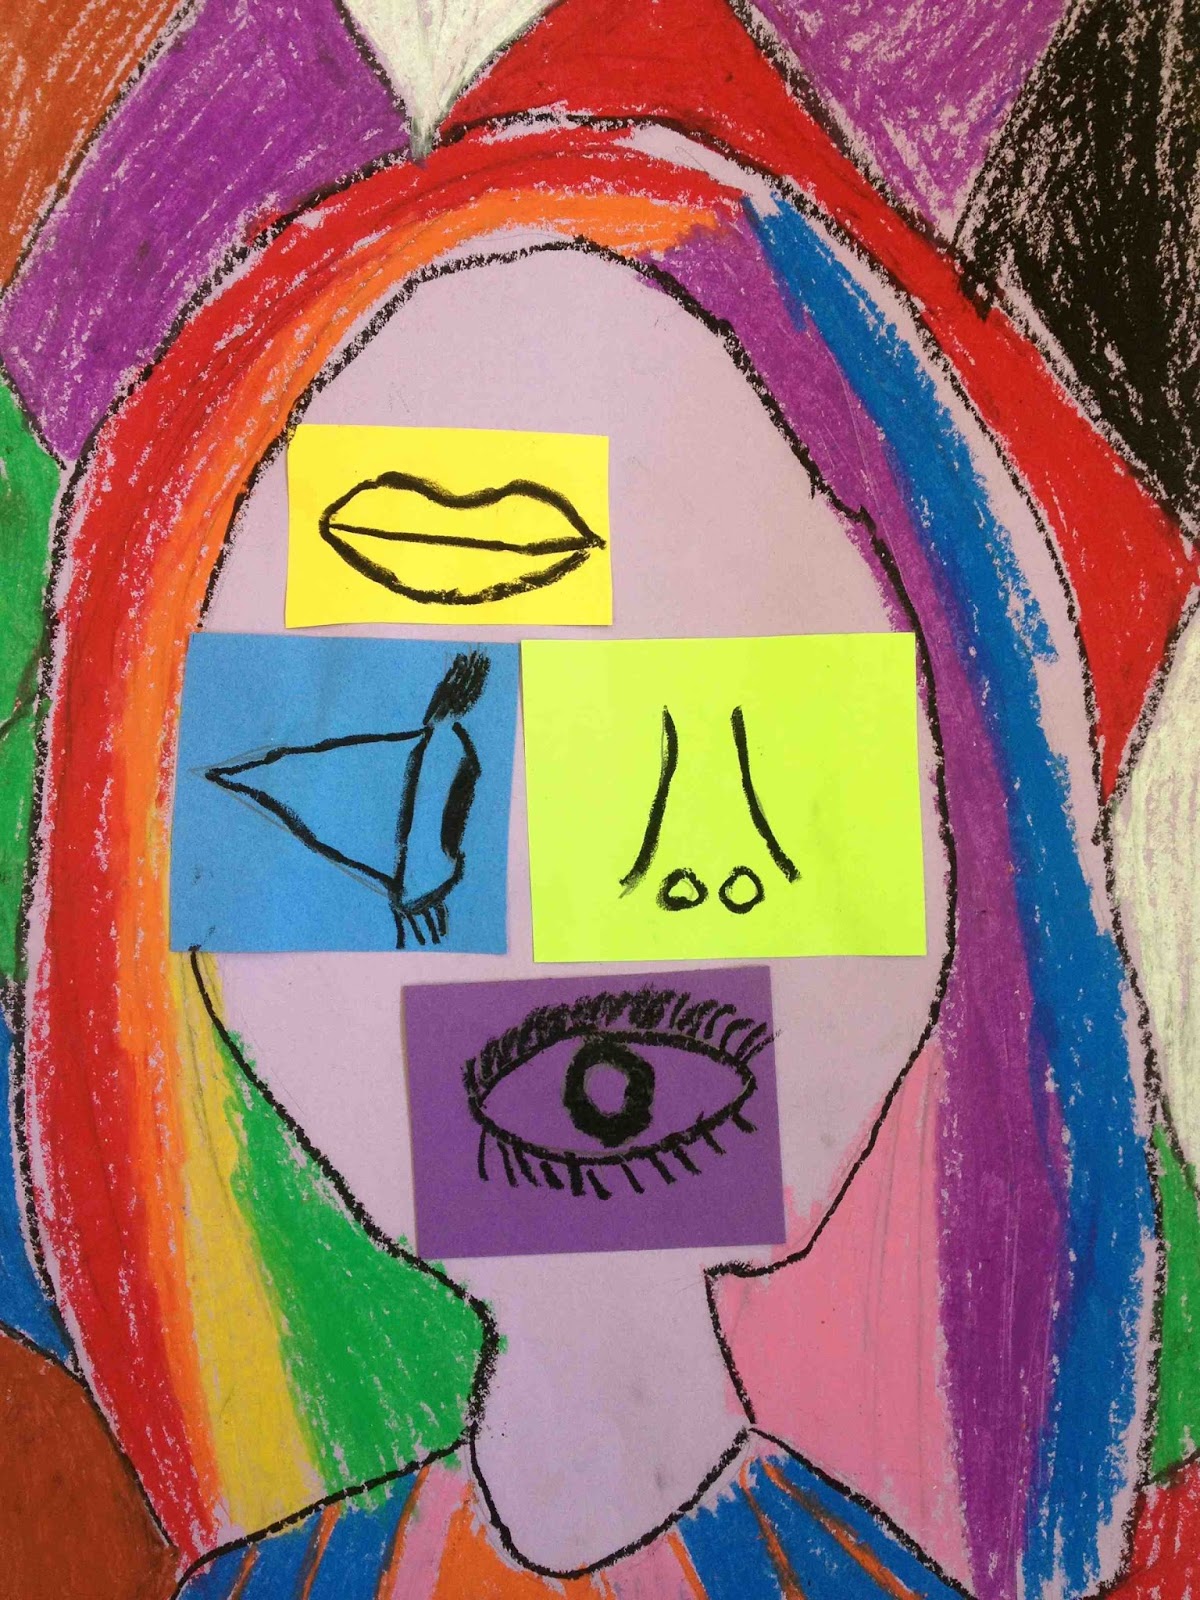
Nola, 3rd grade (Lutz)

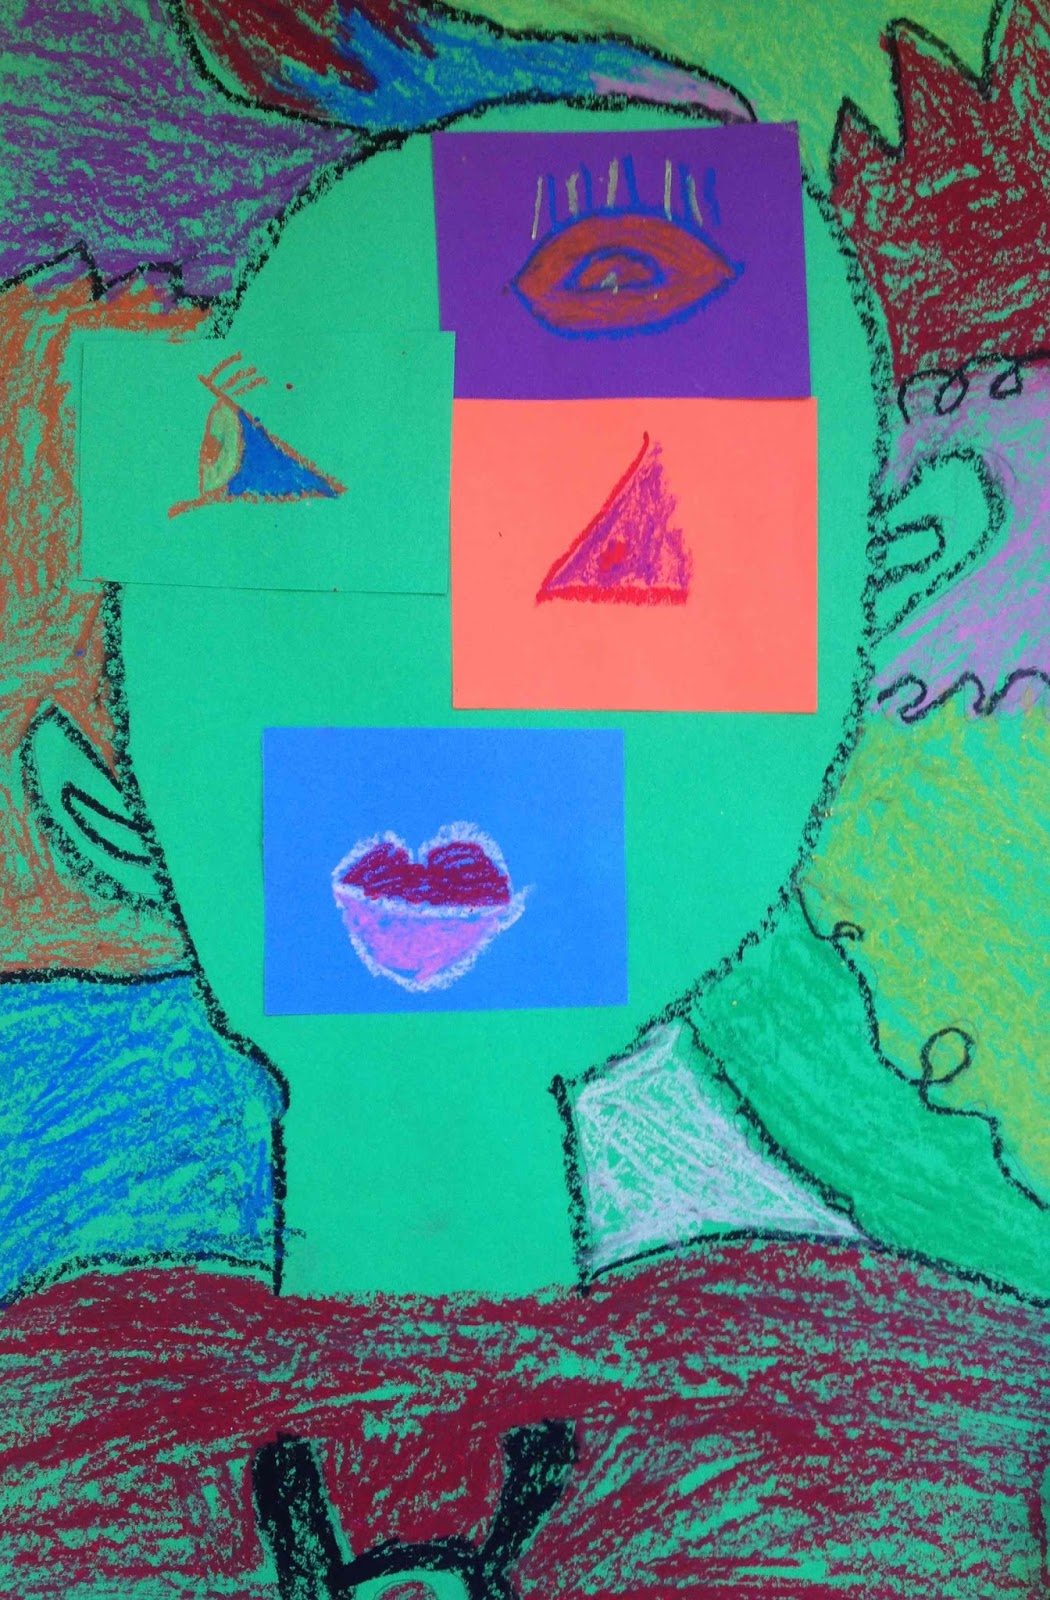
Sona, 3rd grade (Monfette)
Andrew Parker, 3rd grade (Donato)
Emily, 3rd grade (Stone)


Wednesday, April 27, 2016

Texture Printing

Recently, PK and Kindergarten artists have been exploring texture, or how something feels to touch. We began with texture rubbing using crayon. To make the texture rubbings, we placed an object underneath the paper and used the side of an unpeeled crayon to rub on top of the paper and capture the object's texture. Students were given a variety of different objects at their table and experimented with texture rubbing. Students thought about where to place their objects underneath their paper so that they could fill up their whole paper, as well as layer some rubbings on top of each other.
The following class, we explored texture printing. We have already printed with cardboard earlier this school year, in our printed cityscapes. This time, students tried printing with a variety of different everyday objects and materials, as well as different colors of paint!
First, we reviewed how we make a print with an object: dip it in the paint, press it down on the paper, and lift up to reveal the print. We talked about how to leave some space on the paper, so that there would be enough room to visit all 6 different color stations. Then students started printing at their assigned table, with one color of paint. 
Every few minutes, students moved to another table with their group to print with different materials and colors. Objects included sponges, bubble wrap, cardboard paper rolls, plastic mesh, and various plastic caps and lids. Prints were layered on top of each other as students moved around the room. Students were encouraged to explore and experiment with their prints and use the entire paper.
PK and Kindergarten students did a great job with this messy process, making sure to put their objects back in the center of the table for others to share and walking carefully to the next station with their artwork when it was time to switch. It was messy, but also a lot of fun! Here are some examples of our texture printing exploration:
Amelia, PK (Mattson)
Rand, PK (Mattson)
James, Kindergarten (Martignetti)

Arthur, Kindergarten (Tan)
Bianca, Kindergarten (Tan)
Carson, Kindergarten (Bolton)

Calvin, Kindergarten (Martignetti)

Monday, April 25, 2016

Self Portraits from Observation

3rd grade artists recently explored the art of the self portrait. First, students drew their self portrait from observation, using mirrors. We talked about self portraits and how only you can make your self portrait (aka a selfie!). 
We noticed that everyone's eyes, noses and lips looked unique and different from one another. However, where they are located on our face is similar. We measured the distance from the top of our head to our eyes, then shifted that down from our eyes to our chin. We noticed that this was around the same distance, since our eyes are actually in the middle of our head, not at the top. We also noted that the top of our ears are around the same point. And lastly, we took our hands and put them at the bottom of our ears and followed that down so we could feel the width of our neck. 
Then students set about drawing their self portrait from observation, using mirrors. Students started with an oval shape for their head and drew a line across the middle and down the middle of this oval. These lines help provide guidelines for the placement of the eyes and ears, and also helped students to note the symmetry in their face. Focusing on the shapes of their individual features, students looked closely at their eyes, noses and lips, as well as their ears and hair. Students also created a background for the self portrait and used colored pencil to add color. An optional last step was to add a frame!
Yassine, 3rd grade (Stone)
Domenic, 3rd grade (Donato)
Liliana, 3rd grade (Fletcher)
Lucas, 3rd grade (Lutz)
Tessa, 3rd grade (Lutz)
Jessica, 3rd grade (Lutz)
Safa, 3rd grade (Monfette)
Christos, 3rd grade (Fletcher)
Jaylyn, 3rd grade (Monfette)
Kate S., 3rd grade (Lutz)

Friday, April 15, 2016

Self Portrait Assemblages in Motion

Recently, Kindergarten artists learned about self portraits and drew their own self portraits using oil pastel. We learned that a self portrait is when a you create an artwork, like a drawing or painting, of yourself. Only you can create your own self portrait. Students drew a full body self portrait, thinking about the different shapes they could use for different parts of the body.
Naomi, Kindergarten (Bolton)
During the following class, students thought about what their bodies look like when they are doing their favorite activities. We shared ideas and students acted out different activities to see what their bodies look like when they doing things like running, jumping, dancing, swimming, practicing ballet, throwing a ball and playing hockey. 
Next, students chose cut cardboard shapes and glued them together to create their bodies, arranging their arms and legs to show what their bodies look like when they are doing their favorite activities. 
During the following class, we added clothing to our self portrait assemblages. There were many different materials to choose from at the materials table, including paper, fabric, lace, felt, foam, and buttons. 
Students chose different materials to add to their self portrait to give their clothing different colors, patterns and textures. Many students thought about what kind of clothing they wear during their favorite activity, to help select materials. Some students wear a uniform or special outfit for their activity, such as ballet or hockey.
During our last class, we discussed the different parts of our face and students added their facial features, as well as their hair. Students chose different colors of paper for their skin tone, since we all have different skin colors. Students could add their facial features using paper or draw them with pencil and Sharpie markers. Students added yarn for hair, choosing colors that were closest to their hair color. 
After everyone was done, we gathered on the rug to share our self portrait assemblages with the class. We noticed that there were such a wide variety of activities represented! We also worked on being respectful of each other's work. Here are some examples of our self portrait assemblages:
Mary Kate, Kindergarten (Segreve)
"I am swimming."
James, Kindergarten (Martignetti)
"I am playing basketball."
Tyler, Kindergarten (Tan)
"I am twirling."
Gigi, Kindergarten (Segreve)
"I am swimming."
Jayden, Kindergarten (Martignetti)
"I am running."
Gino, Kindergarten (Martignetti)
"I am doing a cartwheel."

Adriana, Kindergarten (Bolton)
"I am doing ballet."
Carson, Kindergarten (Bolton)
"I am playing baseball."
Brook, Kindergarten (Martignetti)
"I am running." 

Tuesday, April 12, 2016

Animals with Tails

1st grade artists explored color and color mixing recently, combining colors to create a variety of new colors, and painting warm and cool color concentric circles, inspired by Kandinsky.
After our color mixing explorations, we began our new project, about animals with tails! Unlike humans, many animals have tails, which help them do a variety of different things. We brainstormed different animals that have different shaped tails, inspired by a variety of different colored and shaped tails.
After our brainstorming session, students selected one animal and sketched it, breaking it down into shapes. After sketching, students got a felt tail to glue down on a larger piece of paper, and drew their animal's body around the tail. We considered composition, so there would be space for the animal's body parts and tail, and how different animals are taller or wider.  
The following class, students mixed colors to paint their animal's body. We thought about the texture and patterns on our animals, whether they are furry, scaly, or feathered. We tried to paint the body in layers, painting the largest parts and adding smaller details and patterns on top.
During the last class, students painted the background for their animal, which included the animal's habitat or environment. Students mixed new colors and thought about how to show where the animal might live. 
Some students painted an outdoor environment, including the sky, water, grass and desert. Some students painted an indoor environment, like a barn or a living room. Here are some examples of our animals with tails! 
Gabby, 1st grade (Massa)
Elizabeth, 1st grade (Massa)


Mary, 1st grade (Massa)
Lucas, 1st grade (Salvucci)
Ella, 1st grade (Mandile)
Ethan S., 1st grade (Landay)
Willa, 1st grade (Torchio)
Kaylee M., 1st grade (Salvucci)
Lily, 1st grade (Massa)
Shane G., 1st grade (Mandile)
Mera, 1st grade (Landay)
Noah, 1st grade (Salvucci)
Nico, 1st grade (Mandile)
Perin, 1st grade (Landay)
NJ, 1st grade (Salvucci)