Friday, December 23, 2016

Happy Winter Break!

Grace, 5th Grade (Twomey)
Happy winter break to all our Hosmer students, families & staff!
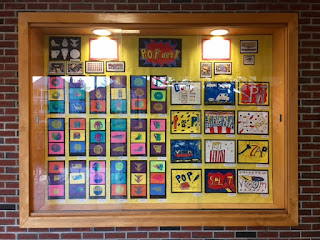
Enjoy the holiday season and see you in 2017!
Natalie, 5th Grade (Bellis)

Wednesday, December 21, 2016

Color Mixing and Naming

Last week, artists in 3rd grade explored color mixing in preparation for an upcoming project! We mixed 10 different colors and also came up with a unique name for each color. We looked at examples of paint chips and noticed that many names were inspired by animals, nature, food, and the weather. 
First, students explored color mixing, trying to come up with 10 different colors for their palette. We discussed how you might try to create a color that you already have in mind, like a light pink, or just see what happens if you mix a lot of yellow, a little blue, and some white. 
Since we had just painted a color wheel with primary, secondary and tertiary colors, students were familiar with which colors to mix together to get a wide range of colors. We also experimented with adding white and black to colors, noting how it made colors lighter or darker. 
After creating the colors, students thought of creative names for each color. Instead of simply naming colors "green" or "orange," students were challenged to come up with creative names like "forest green" and "pumpkin pie." The following class, we partnered up and shared our paint colors and corresponding names with our partners. We shared our favorite color names with each other and then with the whole class. A lot of students used alliteration, which is when you repeat the same letter at the beginning of your words, like "pig pink" and "grass green." Check out some of our creative names for colors below! 


Monday, December 12, 2016

Pattern Weaving

Last month, artists in 1st grade learned how to weave with paper. We practiced by weaving together as a class, with a big loom, and realized that the technique of weaving is a pattern and also creates a pattern.
We started our weaving by making a loom. Students made their loom by folding a piece of paper and cutting several lines, making sure not to cut all the way across the folded side. Once opened, we had our loom! Then students cut two different colors of paper into strips, which they wove through their loom. We made sure to keep in mind to have the lines alternate, over and under, to create our pattern.
The following class, we added shapes to emphasize the pattern in our weaving even more. Students got to use fun scissors with different edges that let us cut different kinds of edges for the shapes. 
Students thought carefully about the colors that would work well with their weaving and help their shapes to stand out. Some students added another layer of shapes inside those shapes, as well as lines and shapes at the top and bottom. Below are some examples of our colorful pattern weaving.
Arthur, 1st Grade (Torchio)
Ava, 1st Grade (Landay)
Dahlia, 1st Grade (Torchio)
Isabella, 1st Grade (Landay)
Liam, 1st Grade (Salvucci)
Maria, 1st Grade (Torchio)
Mary Kate, 1st Grade (Salvucci)
Naomi, 1st Grade (Landay)
Olivia, 1st Grade (Salvucci)

Willow, 1st Grade (Massa)
James, 1st Grade (Massa)

Thursday, December 1, 2016

Pop Art Printmaking, Part 2

Last month, 4th grade artists printed their Pop Art inspired plates. On the first day of printing, we learned about the printmaking process and the steps involved. Students pulled their first prints, using yellow ink on purple paper, to get a feel for how much ink is appropriate and how long to roll it out with the brayer.  
We set up our tables with a bench hook and brayer to roll out ink. Everyone folded a piece of manila paper so that there was a clean side and a messy side. We rolled out the ink using the brayer, listening for a sticky sound that told us that the ink was evenly spread out and ready. We placed the plate on top of the messy side of our manila paper and rolled the ink on top of our plate carefully. We moved it to the clean side and pressed a piece of colored paper on top. Using our hands to gently rub, we then flipped the paper and over and pulled it apart from the plate. Ta da!
For their second printmaking class, students were able to choose their own color of ink and paper. Students made multiple copies with their plate, which the printmaking process allows us to do. On the third printing day, students created prints using three colors of ink in an ombre style, with a gradation of colors. Many students enjoyed this effect and their prints from this day. 
After our printing classes, students selected our three best prints and mounted them on a black background. Since we had done printmaking for three classes, students had many prints to choose from! Students thought about which prints came out the most successfully, looking at the amount of ink, and also tried to display different color combinations. Students arranged them in an order before gluing them down.
After gluing down their three prints, students signed and titled their work. Many students asked each other for advice and also helped each other brainstorm creative titles! We did a gallery walk, so we could see everyone's finished work. Students noticed that there were some very popular subjects that came up often, such as Pokemon and Instagram, but everyone's prints looked different. Many students appreciated the thoughtful and clever titles that their friends were able to come up with, as well!
Students also did a turn and talk with a partner, using their fortune tellers, to share and reflect on their work. Students shared with each other what they were most proud of about their work, as well as something that was challenging and what they might have done differently or changed. Many students were proud of their color choices, the pop culture object they selected, and the way their prints came out, especially the ones using multiple colors. The most challenging part for many students was using the stylus to press into the foam to make their plate and rolling out the right amount of ink when printing. 
Below are some examples of our finished Pop Art prints, inspired by Andy Warhol. As you can see, students did an amazing job mounting their own work! Some prints are also on display now in the glass case in the lobby.
Cammy, 4th Grade (Cikacz)
Caroline A., 4th Grade (Graves)
Daniel, 4th Grade (Doherty)
Dimitri, 4th Grade (Dubuque)
Emma, 4th Grade (Cikacz)
Marwa, 4th Grade (Doherty)
Miah, 4th Grade (Graves)
Niko, 4th Grade (Cikacz)
Nola, 4th Grade (Mattson)
Nolan, 4th Grade (Dubuque)
Patrick, 4th Grade (Doherty)
Pirada, 4th Grade (Dubuque)
Rose, 4th Grade (Mattson)

Monday, November 28, 2016

Arts Around the World: Hojalata Folk Art from Mexico

The first country on our Arts Around the World journey this year is Mexico. 2nd grade students began by learning about the country. 
We learned that Mexico borders the United States and has tall mountains in the center of the country, deserts in the north, and rainforest in the south and east. Many students already knew that Spanish is the official language spoken in Mexico and that their currency, or money, is called pesos.
We focused on the folk art of Mexico, specifically from the Oaxaca region. Folk art is popular art forms that have been passed down through the generations. We looked at one particular form of folk art called hojalata ("oh-ha-la-ta") art, or tin art. Folk artists use tin to create these artworks, cutting and shaping the tin and using different techniques, like embossing, to create patterns and designs on the metal. Artists then add lacquer or enamel on the tin in bright colors.
After looking at examples of hojalata art, students created sketches of different animals from Mexico. Using reference images, students brainstormed a few different ideas before choosing one for their final artwork.
The following class, students learned about embossing, which is a technique where you carve, mold or stamp a design on a surface, like paper or metal, so that it stands out in relief. The two materials typically used for embossing are paper and metal. Metal embossing is used to put a design on metal sheets. The metal is pushed with an embossing tool or stylus to create a raised effect on the opposite side. 
Students taped their design on top of an aluminum sheet, so it would not move around. Then they placed this on top of a piece of felt, which provided a softer surface to work on. Using a wooden stylus, students pressed down on all their drawn lines. 
Students were amazed to see their lines coming through, creating a bumpy raised design on the opposite side of the metal sheet! After they went over all their lines once, they removed the paper on top and went over all their lines again with a blunt pencil. 
This creates a bumpy texture that you can see on both sides of the metal, but we used the side where the lines were raised. After students were done embossing, they used colored Sharpie markers to color in the areas in between the raised lines of their design. The lines created borders for their shapes, and we discussed color choice and how to use complementary colors to help their designs and patterns stand out. 
The final step involved getting the metal hot glued to a background color, creating a frame for their work. Below are some examples of our finished embossed hojalata artworks:
Wyatt, 2nd Grade (McCarthy)
Ellian, 2nd Grade (Hinds)
Zaol, 2nd Grade (Hinds)
Perin, 2nd Grade (O'Connor)
Nico, 2nd Grade (O'Connor)
Lily, 2nd Grade (Hinds)
Katie, 2nd Grade (McCarthy)
Jashua, 2nd Grade (McIsaac)
Sofia, 2nd Grade (O'Connor)
Sophie, 2nd Grade (Pearse)
Zayn, 2nd Grade (O'Connor)