Monday, June 12, 2017

Arts Around the World: Venda Inspired Pottery and Rock Painting from South Africa

The last country we learned about this year, as part of our Arts Around the World curriculum, was South Africa. We began by learning that the country is located in the southern part of Africa and that many different peoples make up South Africa, each with their own language and history. The country has 11 official languages. This colorful mix of cultures gives South Africa its nickname "rainbow nation.”
For our first project, we looked at examples of pottery made by the Venda tribe. We noticed that the clay is a reddish color and there were many different shapes and sizes of pottery. We discussed how different size pots were for different purposes, such as carrying water or storing food. Students also noticed that the designs on the pottery were mainly red and silver in color and involved geometric shapes and repeating lines and patterns.
For our pinch pots, students got terra cotta clay which is a similar color to the red clay we saw in the Venda pottery examples. Students formed a ball with the clay and pushed their thumbs in the middle of the clay ball. Then they pinched around in a circle to create a pot or bowl shape, creating the walls of the pot and flattening and smoothing the inside.
After shaping their pinch pot, students used tools to draw lines and shapes into their pinch pot. We let them dry for a week and then they were fired in the kiln. After being fired once, students got to glaze their pinch pots. 
Even though the Venda primarily use red oxide and graphite (which created the silver color) to decorate their pots, students selected from several different colors to glaze their pottery. 
After glazing, the pinch pots were fired again and students shared their finished pottery with each other through a gallery walk. Below are some examples of our pinch pots, inspired by Venda pottery from South Africa:
Muntaha, 2nd Grade (Pearse)
Ana, 2nd Grade (Pearse)
Isabelle, 2nd Grade (Hinds)
Ella, 2nd Grade (Hinds)
Perin, 2nd Grade (O'Connor)
Sofia, 2nd Grade (O'Connor)
Isabel, 2nd Grade (McCarthy)
Dylan, 2nd Grade (McCarthy)
We also learned about rock paintings made by the San Bushmen, Africa's oldest hunter gatherers. The San Bushmen lived in the Drakensberg mountains of South Africa about 4,000 years ago. During that time they created art on the walls of caves and rock shelters.
We noticed that the art features animals and people, although the people are not represented with a lot of detail. Some students connected this to Egyptian hieroglyphics they had learned about in Social Studies and the idea of symbols. The people are often shown running or hunting, since this was a big part of their lives. We noticed that they used very natural colors, like brown, red and black, since they probably had to use natural materials to make these artworks. We also found it fascinating that 4,000 years ago, people were making art!
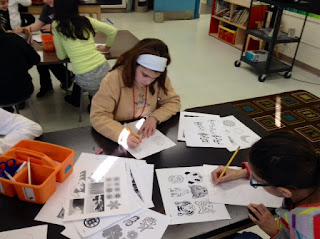
We made our own interpretation by crumpling a piece of brown paper to give it a rock-like texture and using charcoal and chalk pastel to create our drawings. We experimented with blending and smudging the materials.


Thursday, June 8, 2017

I Scream, You Scream, We All Scream for Ice Cream!

In keeping with the warmer weather, 4th grade artists recently created papier mache ice cream cones! We began by creating the armature, or base structure, of our papier mache cones. 
We discussed how buildings often start with a foundation and steel beams that help give it shape and support. An armature helps support a sculpture or 3D artwork from the inside, much like the foundation and steel beams in a skyscraper. 
First, we filled our paper cups with newspaper so that they would not fall over. We talked about how, when building something that stands up, it is important for the base to be heavier and sturdy, to support the weight of materials that go on top -- like when you are building a snowman. Then students balled up more newspaper, wrapping masking tape around the "scoops" to secure them to the paper cup "cone." 
The next class, students learned how to papier mache, using art paste that is clear and thick consistency. We took a little of the art paste to coat our palms, then took strips of newspaper and rubbed them in between our hands. This kept the paste from dripping everywhere and allowed the strips to get fully coated. Each piece of newspaper was applied to the armature and layered on top of each other to fully cover the cone and scoops. 
Next class, we added additional papier mache layers. We used white paper for the ice cream scoops and brown paper towel for the cone, so they would be easier to paint without the newspaper showing through. The following class, students used their knowledge of color mixing to paint their ice cream cone scoops. 
Students were encouraged to paint each scoop a different color and paint the base layer first. Many students used white to make lighter colors called tints. We mixed a variety of different colors to create different flavors, including mint chocolate chip, strawberry, coffee, chocolate, cookies and cream and rainbow! 
After the first layers of paint had dried, students added details like toppings, sprinkles, and hot fudge on top. Some students also painted the cone a darker brown, or painted lines on top to make waffle cones. 
The last step was to cover the entire ice cream cone with a clear varnish called Mod Podge. Here are some examples of our cool, colorful ice cream cones on display at the Extravaganza. Look for them downstairs in the glass display case soon!


Andrew P., 4th Grade (Doherty)
Catie, 4th Grade (Cikacz)
Christos, 4th Grade (Cikacz)
Elen, 4th Grade (Dubuque)
Gio, 4th Grade (Cikacz)
Kate R., 4th Grade (Mattson)
Kate S., 4th Grade (Mattson)
Sawera, 4th Grade (Doherty)
Yassemine, 4th Grade (Doherty)

Monday, June 5, 2017

Plaster Masks

This spring, 5th grade artists created plaster masks, which took us several weeks. The process involved designing their mask, creating the mask form out of plaster strips, painting their mask and writing an artist statement to accompany their mask on display. We began by discussing masks, why we wear masks, and learning about masks around the world.
Students connected masks to Halloween, as well as masquerade parties and even sports. We talked about how masks can help you hide your identity, or assume a different one. They can also help protect your face, or just be worn for fun. We learned that masks have a long history and have been created, used, and worn by cultures all over the world. They are also made from a variety of different materials. 
For example, in ancient Egypt, masks were used to dress the faces of the dead. Royal death masks were made of gold and bronze and meant to look like the person. In Japan, samurai masks were designed to instill fear in opponents, as well as protect the wearer. They were often made of iron and leather. In Italy, during the Carnival Festival in Venice, elaborate masks are worn to provide mystery. And in West Africa, masks are used in religious ceremonies to communicate with spirits and ancestors. Many are made with wood, ivory or clay. 
After learning about masks, students sketched out design ideas for their own plaster mask. Many students were inspired by popular culture, super heroes, symbols, and sports. We also cut plaster strips to prepare for mask making. Mask making was done in two sessions, with half the class making their mask one week, and half the class making their mask the following week. The class also came early to art class, so that we would have enough time to complete three layers of plaster. Thank you to the 5th grade teachers for making extra time for this project! 
To make their plaster mask, students began with a plastic mask form that was covered with Vaseline, so that their finished mask would slip off easily when dry. Students dipped pieces of dry plaster in water, then placed them on their plastic mask form and smoothed them with wet fingers to make the plaster come out and cover the holes. 
Students made sure to overlap their strips and could choose whether to leave the eye holes open or closed, as well as the mouth. This depended on their design. After three layers of plaster, the masks were left to dry. 
After our plaster mask making sessions, students got their dry mask back and were ready to paint! We used acrylic paint (instead of tempera paint, which we usually use) so that they paint would stay on and not flake off the mask later. Students noticed that the acrylic paint dried quickly. 
Students spent two to three classes painting their masks, considering how to paint their design in layers so that they could add details on top. Depending on the design, some students had to paint their mask all one color, or two colors, before adding details on top. Other students began with the white base of the mask and painted details directly on top. 
On our last mask making class, student added extra details using a variety of different materials. Some students added ears to their animal mask, or feathers to a masquerade inspired mask. 
The following class we worked on artist statements for our masks. An artist statement is a written explanation of an artist's work. You can tell the viewer about the motivation and inspiration behind your design, how you made your work, and any additional information you want the viewer to know. Students typed up their artist statements so they could be accompany their mask on display. Below are some examples of our plaster masks on display!