Showing posts with label Clay. Show all posts

Friday, June 22, 2018

Clay Projects

This May and June, students in several grade levels have been working with and making pieces out of clay! 1st grade artists made pinch pot monsters, 3rd grade artists made coil pots, 4th grade artists made coil pots with lids, and 5th grade artists made independent clay projects. Clay comes from the Earth and is made up of different minerals. We learned that clay goes through many stages to become a ceramic object, starting with wet clay, drying out in the air to become bone dry, then getting fired in the kiln the first time to become bisque.
For pinch pot monsters, 1st graders started with a pinch pot. Students pushed their thumbs in the middle of the clay ball and then pinched around in a circle to create a pot or bowl shape. Then, we turned them on their side and added details to create monsters. Some students chose to add tongues, teeth, multiple eyes, and horns. Students made sure to score or scratch up the clay and use slip to add their smaller detailed pieces to their pinch pot, so that everything would stay on. 
3rd graders made round coil pots and 4th graders made triangular shaped coil pots. The coil pot began with a flat bottom and rolling the clay into coils around the sides to form the walls of the pot. Students made sure to score and slip the coils. 4th graders also added slab lids to their triangular coil pots, like pizzas, cake and watermelon.
5th graders were able to choose from all these options and create their own independent project that took the form of a pot, flat slab or slab box. They began by sketching out their idea in their sketchbooks. The slab box involved the most measuring and scoring all the pieces. To make the slab box, students rolled out the clay to create flat pieces or slabs and cut them using a template to form the bottom and sides of the box. They assembled the sides by scoring the base and each side and using slip to attach everything together and smooth all the edges. 
After getting bisque fired in the kiln, students used glaze to add color to their monsters. Students moved to different color stations depending on which colors of glaze they wanted to use and painted three layers of each color. Students had to carry their coil pots to the different stations very carefully! We got our projects back after they had been fired again, to melt the glaze and make it shiny. Below are examples of our various clay projects: 
Edwin, 4th Grade (Cikacz)
Audrey L., 1st Grade (Massa)
Lily L., 4th Grade (Mattson)
Mia Z., 4th Grade (Doherty)
Jaylyn, 5th Grade (Twomey)
Sophie, 5th Grade (Bellis)
Brady, 5th Grade (Domermuth Fantasia)
Breanna, 5th Grade (Twomey)
Graham, 1st Grade (Massa)
Sila, 5th Grade (Bellis)
Anna, 5th Grade (Twomey)
Emily, 5th Grade (Twomey)
Finn, 1st Grade (Mandile)

Tuesday, February 6, 2018

Arts Around the World: Venda Pots and Cave Drawings from South Africa

The next country we learned about this year, as part of our Arts Around the World curriculum, is South Africa. 
We began by learning that the country is located in the southern part of Africa and that many different peoples make up South Africa, each with their own language and history. The country has 11 official languages. This colorful mix of cultures gives South Africa its nickname "rainbow nation.” 
For our first project, we looked at examples of pottery made by the Venda tribe. We noticed that the clay is a reddish color and there were many different shapes and sizes of pottery. We discussed how different size pots were for different purposes, such as carrying water or storing food. Students also noticed that the designs on the pottery were mainly red and silver in color and involved geometric shapes and repeating lines and patterns. 
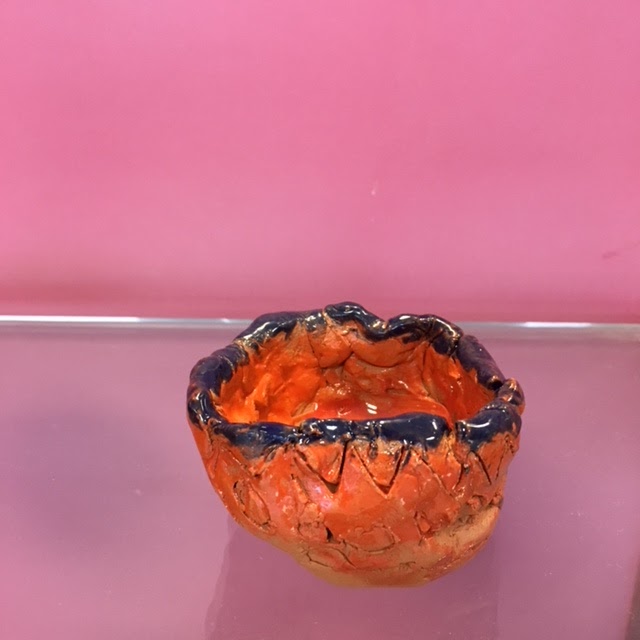
For our pinch pots, students got terra cotta clay which is a similar color to the red clay we saw in the Venda pottery examples. Students formed a ball with the clay and pushed their thumbs in the middle of the clay ball. Then they pinched around in a circle to create a pot or bowl shape, creating the walls of the pot and flattening and smoothing the inside. After shaping their pinch pot, students used tools to draw lines and shapes into their pinch pot. We let them dry for a week and then they were fired in the kiln. 
After being fired once, students got to glaze their pinch pots. Even though the Venda primarily use red oxide and graphite (which created the silver color) to decorate their pots, students selected from several different colors to glaze their pottery. After glazing, the pinch pots were fired again and students shared their finished pottery with each other through a gallery walk. Below are some examples of our pinch pots, inspired by Venda pottery from South Africa: 
Calvin, 2nd Grade (Pearse)
Lily, 2nd Grade (O'Connor)
Mahnoor, 2nd Grade (Pearse)
Marie, 2nd Grade (O'Connor)
Niko, 2nd Grade (O'Connor)
Sean, 2nd Grade (O'Connor)
Theo, 2nd Grade (Pearse)
Adriana, 2nd Grade (Hinds)
Antonio, 2nd Grade (Stone)
Caitlin, 2nd Grade (Hinds)
Duncan, 2nd Grade (Stone)
Gabe, 2nd Grade (Hinds)
Jayden, 2nd Grade (Hinds)
Olivia, 2nd Grade (Stone)
Tigran, 2nd Grade (Stone)
We also learned about rock paintings made by the San Bushmen, Africa's oldest hunter gatherers. The San Bushmen lived in the Drakensberg mountains of South Africa about 4,000 years ago. During that time they created art on the walls of caves and rock shelters. We noticed that the art features animals and people, although the people are not represented with a lot of detail. Some students connected this to Egyptian hieroglyphics they had learned about in Social Studies and the idea of symbols. 
The people are often shown running or hunting, since this was a big part of their lives. We noticed that they used very natural colors, like brown, red and black, since they probably had to use natural materials to make these artworks. We also found it fascinating that 4,000 years ago, people were making art! We made our own interpretation by crumpling a piece of brown paper to give it a rock-like texture and using charcoal and chalk pastel to create our drawings. We experimented with blending and smudging the materials.

Thursday, June 15, 2017

Independent Ceramic Projects

Recently, 5th grade artists made an independent clay project. We discussed what we knew about clay, how it clay comes from the Earth and is made up of different minerals. We learned that clay goes through many stages to become a ceramic object, starting with wet clay, drying out in the air to become bone dry, then getting fired in the kiln the first time to become bisque. 
Options were a pinch pot or pinch pot figure, such as an animal; a coil pot; or a slab box. We sketched out our project idea and the following class, students got clay and got started. For pinch pot figures, students started with a pinch pot. First we put our thumb in the middle of the ball of clay. We pressed down to form a hole and then used our fingers to pinch the sides. We turned our clay as we pinched so that the sides of our pot would be even and in a circular shape. Then this could be transformed into the body of an animal. 
Another option was a coil pot, which begins with a circular bottom and rolling the clay into coils around the sides to form the walls of the pot. Students made sure to score and slip the coils. The third option was a slab box, which involved the most measuring and scoring all the pieces. To make the slab box, students rolled out the clay to create flat pieces or slabs and cut them using a template to form the bottom and sides of the box. They assembled the sides by scoring the base and each side and using slip to attach everything together and smooth all the edges. Some students created a lid for their coil pot or slab box, and added details, such as shapes or letters, on the outside. 
Projects were left to dry for a week and then put in the kiln, which is an oven for the clay to get heated and become hard. Students got to take a look at the kiln in small groups, to better understand what it looks like and what it does. Students got their clay projects back after they had been bisque fired in the kiln. The clay projects had turned white and had gotten a little smaller. 
Then we used glaze to add color. Different color stations were set up and students went to different stations to use the colors they wanted. Each color needs 3 coats, or layers, of glaze to show up true to color. 
We made sure to dab and pat our brush around to get all the areas and cover all the white spots, since the clay has a texture and is not always smooth or easy to paint. We got our projects back after they had been fired again, to melt the glaze and make it shiny. Below are examples of our 5th grade independent clay projects:
Ani, 5th Grade (Psychoghios)
Anna, 5th Grade (Psychoghios)
Ashlynne, 5th Grade (Bellis)
Bella, 5th Grade (Psychoghios)
Cicily, 5th Grade (Psychoghios)
Dorothy, 5th Grade (Psychoghios)
Joe, 5th Grade (Psychoghios)
Lalita, 5th Grade (Psychoghios)
Suhasini, 5th Grade (Bellis)
Grace, 5th Grade (Twomey)
Hashir, 5th Grade (Twomey)
Lily, 5th Grade (Twomey)
Elena, 5th Grade (Bellis)
Halle, 5th Grade (Bellis)
Chloe, 5th Grade (Domermuth)